Wednesday, June 3, 2015

Emotiva XMC-1 and Dirac Live

Introduction

All normal rooms have modes that induce standing waves that interfere destructively with sound reproduction.  (See here and here for two introductory articles by Michel Leduc on the topic of Listening Room Acoustics and why it matters.) Loudspeakers interact with the room bouncing sound waves off walls, ceilings, and floors, possibly muddying the sound received at the listening position. It gets pretty complicated fast. Proper speaker and hearer placement (see relevant Floyd O'Toole articles here and here), room treatment, and digital signal processing methods (aka Room Correction) can mitigate many of these undesirable effects and clearly improve sound reproduction.
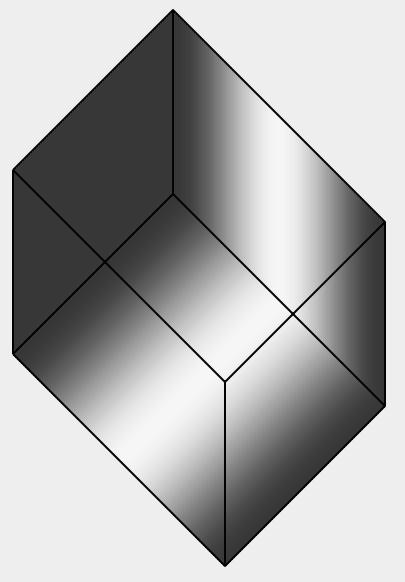
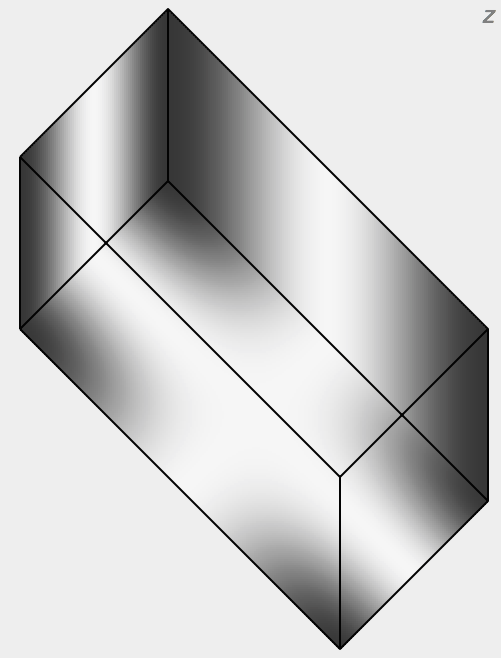
from http://www.hunecke.de/en/calculators/room-eigenmodes.html
The Emotiva XMC-1 processor has built-in Dirac Live room correction. However, it needs the assistance of a computer (and an internet connection) at calibration time. This means you run Dirac Live on a computer, measure the room at the listening position, and download wirelessly the computed filters to the XMC-1's single Dirac preset. If your music is digital, this is all done in the PCM domain without any extra analog/digital conversion steps. Once dialed in properly, the difference between an uncorrected and corrected room is huge and plainly obvious.

Dirac Live is a DSP technology that corrects for both frequency-domain and time-domain (impulse) response. Dataset's RS20i (see here) also incorporates Dirac Live but is priced 10x higher. Trinnov is another company that has its own frequency and time domain correction algorithms, integrating an Intel PC into the box, but again at a much higher price point. Some competing systems typically found in home theater receivers, e.g. Audyssey, Yamaha's YPAO, Pioneer's MCACC, and Anthem's ARC (I believe), perform frequency domain correction only.

Another option would be to have Dirac Live in its own box separate from the pre-amp/processor, like with MiniDSP's nanoAVR DL (see here). (Unfortunately, the nanoAVR DL requires Windows.) Computer audiophiles with a pre-ripped music library on a server or hard drive can purchase Dirac Live as a generic PC/Mac application that can integrate with various player apps.

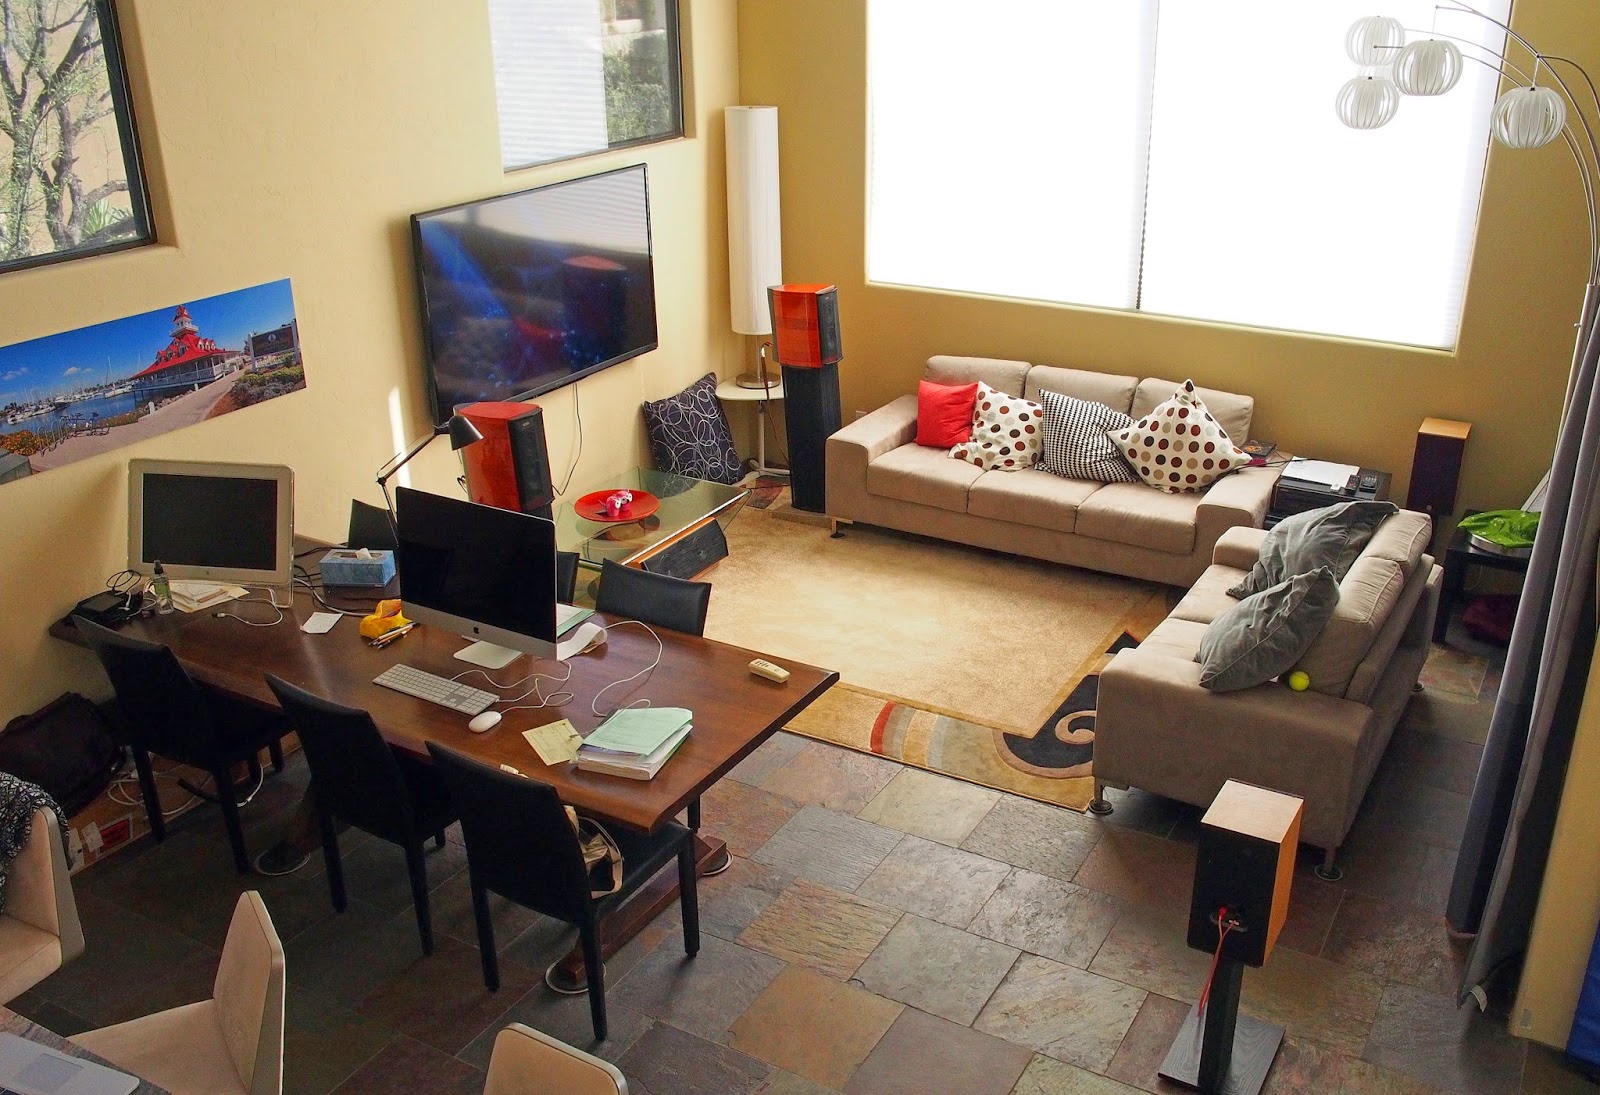
The main point of the XMC-1 processor for me is having a DSP stage with Dirac capabilities integrated with D/A  conversion. (The XMC-1 uses fairly high-end Burr-Brown 24/192 DSD1796 DACs that are hopefully excellent.) The Oppo player (see picture below) can function as a pure transport in the sense that it can send digital audio from either physical media (e.g. cd, sacd, dvd-a, blu-ray) or from a USB-connected hard drive to the XMC-1 for decoding and D/A conversion prior to power amplification. (In other words, the Oppo doesn't perform D/A conversion in my system - although it could, using its own  Cirrus Logic CS4382A DAC.)

Dirac Live for the Emotiva XMC-1

Unfortunately for those of us who are OSX-based, the free Dirac LE that comes with the XMC-1 is not yet available. However you can pony up $100 and spring for the full Dirac Live (like I did). In either case, I believe Emotiva supplies an activation code. 
Once activated, there's a page with links to download the Dirac application for Mac or Windows:
This Dirac app is specific to Emotiva's XMC-1 because it contains Emotiva-specific code that communicates with (and controls) the XMC-1.

The Local Area Network (LAN)

Assuming you're able to have the XMC-1 and computer see each on the LAN, the procedure is quite straightforward.  (Unfortunately, DHCP on the XMC-1 doesn't play well with my Netgear router, I ended up having to turn DHCP off and use a static local IP.)
(If all is well, you should be able to ping and login remotely to the XMC-1.) 
Note also that the XMC-1 curiously does not have built-in wifi. However, there's an Ethernet port on the back:
You could plug a wifi adapter into the port. I've verified it works. But since the XMC-1 seems finicky,  for reliability I chose to run an Ethernet cable from the router directly to the XMC-1.

Dirac Sound Quality

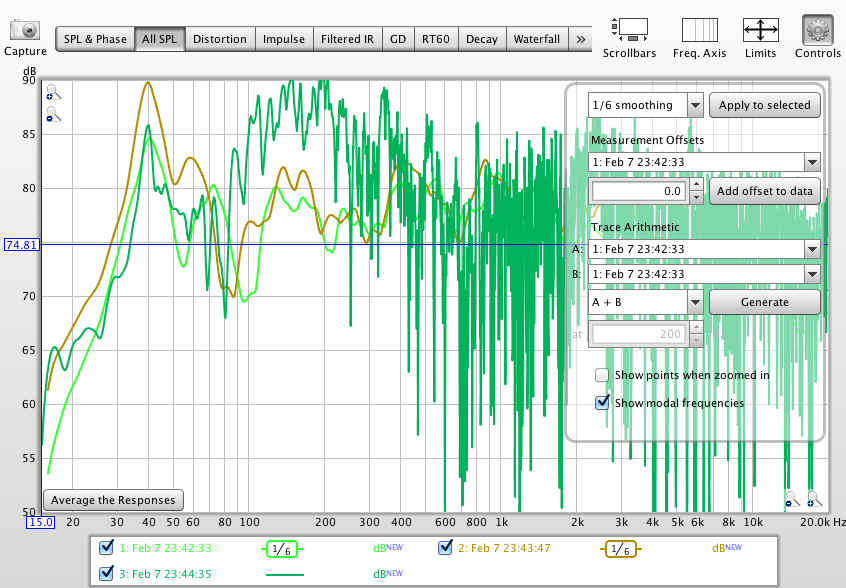
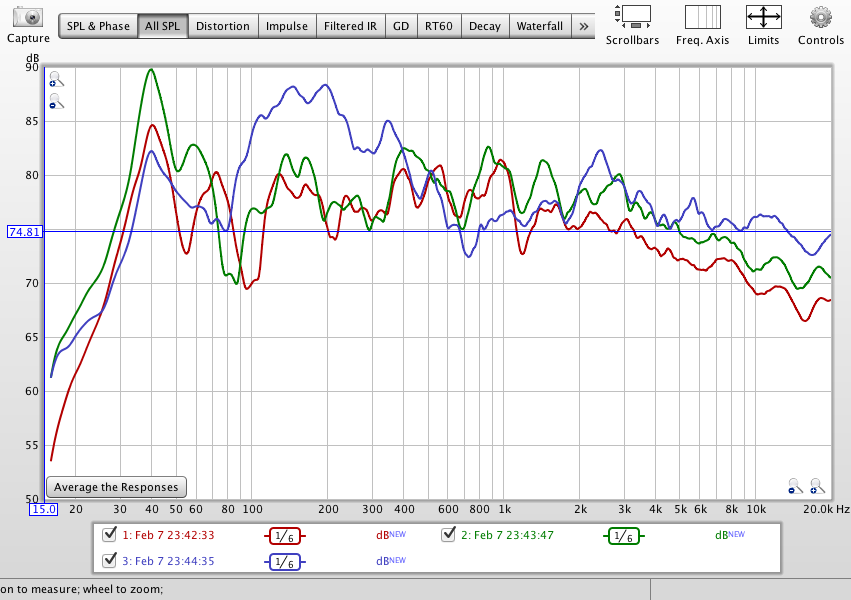
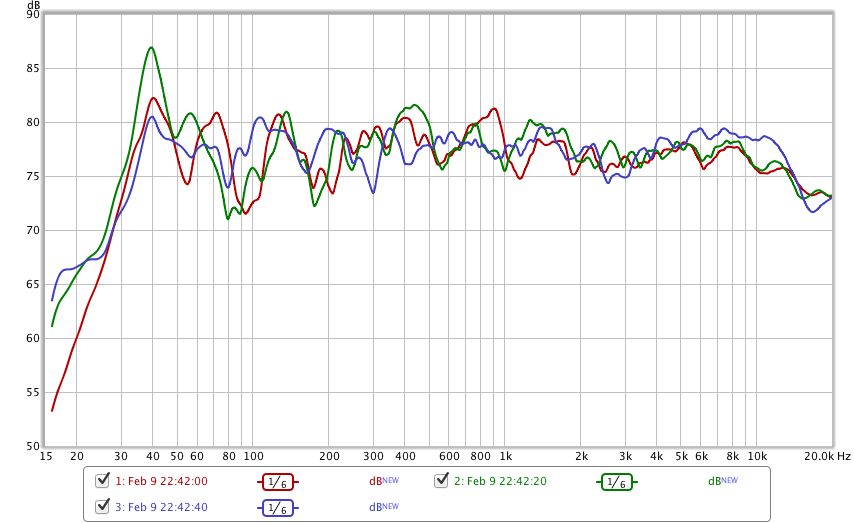
Though one should optimize speaker and listening position as far as possible given particular room parameters before running Dirac, there always seems to be room for improvement. (This is where REW is very handy, see my previous blog post on using REW here.) 

Frequency-wise, the benefits of Dirac are very apparent; it cleans up resonances. Not sure if it really attempts to deal with suckouts though (because those can be caused by room interactions).  The soundstage is also massively expanded. However, I find Dirac compromises (pin-point) imaging to the point I prefer to listen to Preset 1 (no Dirac, distances and levels set manually) - unless one is very careful and consistent with the measurements. (I will attempt to document these steps here below.)

The USB Microphone

An EMM-1 mic ships with the XMC-1. Its calibration file is supposedly doctored to produce an Emotiva-approved house curve. 

However, I used an UMIK-1 USB mic, individually calibrated by Cross Spectrum Labs, which I bought for REW use. The mic plugs into your computer (not the XMC-1) and the Dirac application recognizes it. 

Running the Emotiva Dirac app on a laptop is particularly convenient since you can move it close to the XMC-1:

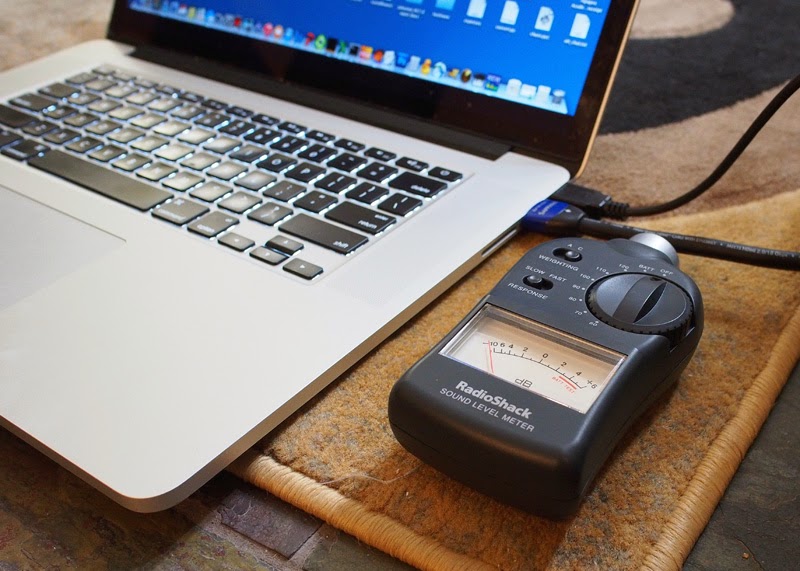
With a desktop, there may be cabling problems. In my case, the supplied USB cable was not long enough and I needed to use an extension. (I also need a HDMI extension cable in order to run REW. I use REW in conjunction with the UMIK-1 as an SPL meter to check levels.)

Running Dirac Live for Emotiva

OK, let's fire up the Dirac application on OS X. It should see the XMC-1 on the LAN. 
If it doesn''t, obviously you need to fix the network issues first, otherwise you can't proceed. Once you press OK, the XMC-1 is under the control of the application and it no longer responds to the remote or front panel buttons (except, I suppose, the big turn on/standby button when things get stuck). The panel will display "connected". 

The application itself is divided into thematic tabs shown on the left, and the user is taken step-by-step through them. The Sound system tab refers to the speaker configuration already set up on the XMC-1 device. (You need to do that before running Dirac.)
My subwoofer still hasn't arrived yet, so I'm using it in 5.0 mode: front left and right speakers, a center channel and left and right surrounds. 

(There might be a bug with respect to levels if you don't use a subwoofer, and level adjustment might be required after Dirac.) 

Next, you need to select your mic.
Notice here I'm using the UMIK-1 with the 90 degree narrow band calibration file supplied by Cross Spectrum Labs. (The XMC-1 ships with a EMM-1 mic that works fine except that it has a pre-programmed calibration file that reflects Emotiva's preferences for a house curve.) 

Next I need to set the input gain. There are two steps. Dial down the input gain slider until the levels are just below -24dB. Then for each output channel in turn, hit Test and adjust the Output volume slider until the level hits the middle of the -12dB green zone.

Because I'm using different amplification to run the center channel, the sensitivity of that channel needs to be dialed down separately using the Channel volume slider to stay within the green zone. 
I had to dial in some trim with the surrounds too. (I'm using different amplification for them too.)
Finally, we are ready to take measurements. Dirac Live takes 9 measurements, the first is at the sweet spot, i.e. the main listening position, and the other 8 are tightly clustered around the sweet spot. 

Having performed measurements multiple times, I find the results really disappointing with respect to proper imaging unless I proceed very carefully and keep the cluster of points fairly compact. (Note: Dirac warns that the points be not too compact, the downside being over-fitted or optimized "lifeless" sound.)

The UMIK-1 (and the EMM-1) mics seem extremely sensitive. I believe one has to be very careful with spot selection. Probably, 6 inches of deviation would be massive. For consistency, I mark off the horizontal points on the back of the sofa with bits of tape. (Here I've spaced them out about 7 inches apart. I dare not go any tighter. More than 12 inches apart, I find the imaging loses its tightness. Obviously, given the angles subtended, it'd depend on how far away you sit. I'm about 10' 7" from each of the front speakers, as measured by laser to the main listening position.)
The Dirac manual states:
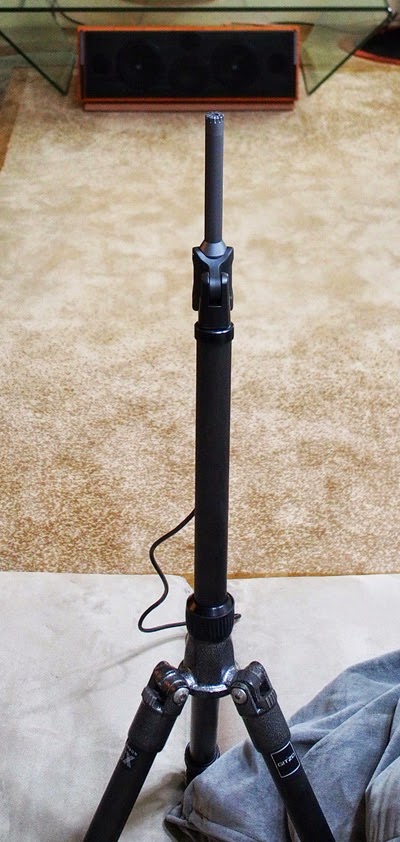
"Avoid making measurements in a too small space. Even for the “Chair” listening environment, it is important to spread out the microphone positions in a sphere of at least 1 meter of diameter. A too small space will result in over-
compensation that will sound very dry and dull."
I found I needed to use three different tripods to achieve reasonable vertical consistency between the high and low points, front and rear. (It would be nice if someone came up with an adjustable multi-parallelogram mesh rig with 9 points for easy and accurate mic placement.)
Example: high front
Example: low rear

Example: high rear
Each time I do not go to all this trouble, I find I've wasted time. The Dirac imaging is horribly diffused, skewed and sloppy compared to Preset 1 (where I have manually adjusted levels and distances). 

As mentioned previously, you're prompted for in turn to set up 9 different microphone positions, beginning with the sweet spot.
It'll generate graphs of the frequency response curves for various speaker groups, e.g. front left and right, center, surrounds etc.  And an editable target curve:
Front left and right speakers
Here are the corresponding plots for the center and surround channels:
Center channel
Left and right surrounds
Computing the filters gratuitously requires your computer to have internet access to Dirac's servers, which is an attempt to keep licensing and use firmly under Dirac's control. The resulting filters will be downloaded to the XMC-1 by Dirac Live for Emotiva via the LAN. The filters are also verified after downloading:
Unfortunately, on Mavericks, this is where it often crashes on me. If successful, a confirmatory dialog box will be displayed:
On Mavericks the verification fails to complete about half the time:


So it pays to save the project before download to save re-measuring the room. On Yosemite, I've not had any crashes. After success, the application disconnects from the XMC-1, and the remote works again.

Adjusting Levels

For reasons that I'm still not entirely clear about (possibly related to the differing gain of the various amplifiers I'm using or that I'm calibrating without a subwoofer), post-Dirac I find I always need to go in and equalize the levels of each channel. (The XMC-1 has a built-in test tone generator at 65/75/85dB levels.) I'm really not sure why this is not done for me automatically. 

System architecture-wise, levels are adjusted in the analog domain and follow the DSP stage. 

For example, here are my current post-Dirac levels (properly adjusted):
And just for comparison, I have my Preset 1 levels manually adjusted as follows:
The front left and right speakers are driven by two channels from a stereo tube amplifier. The center channel is driven by a different tube amplifier, which happens to be a monoblock. 

The surrounds are driven by yet another stereo amplifier; this time a solid-state amp. All three amplifiers have different gain, so these differences are not surprising. 

Distances are also manually programmed into Preset 1. (I use a laser distance measurement tool and a piece of white cardboard as the target.)
Unfortunately, it's not possible to see what the computed distances are for the Dirac Preset.

Finally, I leave Preset 2 untouched. It has distances set at 0'0" and no gain is applied on any of the channels.

Conclusions

When I first bought the XMC-1, I thought I'd made a mistake. What's the use of room correction if it messes up the sound in some critical way? I guess I'd expected it to be plug-n-play. It's plainly not that kind of hardware or technology. Although Dirac Live did a great job with the frequency response (and presumably phase coherency between speakers), plus the soundstage is much larger; however, I was unwilling to pay the price of inferior pinpoint stereo imaging. The Speaker Preset button on the remote allows you to turn Dirac on/off with just a short (1 sec) delay. This make A/B comparisons easy and obvious. And the differences are huge. Careful positioning of the microphone is critical; but the reward is room correction with no significant downsides as far as I can tell. A purist might be horrified, but technology marches onwards and upwards...


Sunday, February 22, 2015

Do animated GIFs work in blogspot?

Animated GIFs are cool because you see a looped animation without having to click on anything. It just appears and autoplays. Can convey more than a single image no matter how gorgeous.

Let it flow...
However, unfortunately Facebook doesn't support animated GIFs. I wonder if they work on blogspot.

Here is a test. Preparing my coffee this morning. Does it animate?

575 x 670 (256 colors) animated GIF.
2oz pour. 16.4g of espresso coffee beans.

Non-standard parts involved:

  1.  Gaggia bottomless portafilter (see http://www.wholelattelove.com/products/gaggia-bottomless-portafilter). 
  2. A non-pressurized double shot filter basket. 
  3. Rattleware 3oz shot glass pitcher (see http://www.wholelattelove.com/products/rattleware-3-oz-shot-glass-pitcher).

Sunday, February 8, 2015

Room EQ Wizard (REW) on OSX

Would you like to know if your speakers are placed poorly in your room? Are there room resonance interactions you can avoid? If so, Room EQ Wizard, known as REW, is a incredibly useful and free program written by John Mulcahy for room analysis. This post documents how to get it all up and running on a Mac. All of the following information is available on the internet, e.g. [1], [2], [3] and [4], but not in one place. 
Sonus Faber Guarneri Mementos up front plus Cremona M center channel. Celestion SL-6 are my surrounds.
REW is written in Java. Version 5.0.1 beta 24 is the latest version at this time. (On Mavericks, Java Runtime Environment (JRE) 7 is installed by default but REW uses JRE 8.) However, REW runs fine under Mavericks (10.9) on my Macbook Pro. (I bet it runs fine under Yosemite (10.10) as well.) How? Well, it is bundled with and makes use of JRE 8 inside its own folder in Applications.

My laptop has a HDMI (digital) output that connects to my Pioneer receiver. The connection is necessary to route the test tones generated by REW to your speakers. A total of two cables are attached to my laptop, as shown below.

Macbook Pro. HDMI cable to receiver. USB cable to the UMIK-1 microphone. Radio Shack meter.
In addition, you will need:
  1. A sound pressure meter for REW SPL calibration. (Set on C weighting and slow response.) Radio Shack has a cheap one for under $30. The classic one I got on sale (see pic above) is no longer available.
  2. UMIK-1 mounted vertically via a Gitzo camera tripod at the listening position.
  3. A calibrated USB microphone to pick up the test tones REW generates. The UMIK-1 is available from MiniDSP.com for $75. Conveniently, REW from version 5.0 onwards can auto-detect the UMIK-1. Cross-Spectrum sells a carefully calibrated version of this microphone for $100. I have the Cross-Spectrum UMIK-1 shown above. Notice that the microphone is positioned vertically in the picture above, and not pointing at any individual speaker. That's because we don't want to reposition the microphone for each individual speaker sweep. Although it's an omni-directional microphone, you need it calibrated specifically for this 90° position. Cross-Spectrum supplies the necessary calibration file.
Software-wise, you will also need a free program called Soundflower, a (virtual) audio middleman that allows you to route REW's output to the appropriate HDMI channel. First, plug in the HDMI cable to the receiver. In the Audio Midi setup app (found in Applications/Utilities), select HDMI. For output, format should be 48000.0 Hz.
In Configure Speakers... select the surround sound system you have. I have 5.1 surround selected. You can test if things are properly configured by clicking on each speaker icon and it'll play a test tone for a few seconds. All versions of HDMI have support for 8 channels of LPCM audio. By convention, HDMI channel 1 is the left front, channel 2 the right front, channel 3 the center speaker, channel 4 the subwoofer, and so on.


After Soundflower has been installed, start the Soundflower bed application. Once started, a cute flower icon at the top enables a pulldown menu. If the HDMI cable is connected (and selected by the receiver?), you can select HDMI for Soundflower (64ch) as shown below:

Then pairing Channel 1 with HDMI[1] will send REW test tones to the left front speaker. (To switch REW output to another speaker, just select the appropriate HDMI[X] channel.)

Selecting Channel 2 as None will silence REW for any other speaker.
Next, start the REW application. Assuming it's REW 5.0 or later, if the UMIK-1 microphone is plugged in, it should be able to see it and pop up the following messages:

Since the microphone is installed pointing directly upwards at the ceiling (see earlier picture), and we're not going to bother to (re-)point it at each speaker individually during measurement, use the narrow band response 90 degree calibration file supplied by Cross-Spectrum:
Once REW has started up, click on Preferences and check to see the output sample rate is 48 kHz and the virtual output device is Soundflower (64ch).


Explanation: REW will send the test tones to Soundflower and Soundflower will route it to the HDMI channel you've specified via the Soundflower bed pulldown menu above. Note that REW has already selected the input device to be the UMIK-1. I believe we're setting everything to sample at 48 kHz because the UMIK-1 is a 48 kHz native device (not all microphones are). The Input Volume (at 1.000 above) may need to be adjusted down if you need additional headroom; more on this later.

Next, click the SPL Meter button on the top row. Then click Calibrate on the REW SPL Meter.

(I chose to use the speaker cal signal because I'm not currently running a subwoofer.)

REW will now send pink noise to your left front speaker.  Take the sound level meter and place it next to your microphone at the seating position.
Put it on C weighting (a mostly flat frequency response curve) and slow response (smoothed, 1 sec time constant). Set the sound level meter range dial to 80dB. Adjust your receiver volume until the physical meter reads 0dB, i.e. 80dB. Enter Finish. Then you should see something like the following message.
(To measure higher, the Input Volume field for the microphone, currently at 1.000, can be adjusted lower in REW preferences.)

The noise floor of USB-based microphones is about -50db. (Reality check: if the REW SPL meter is showing a much lower range, you have it adjusted wrong.)

Finally, it's time to do some measuring! Select Measure on the top row. Select for a sweep from 15 hz to 20,000 hz, and select Start Measuring:

(I'm not sure why people choose to begin early at 15Hz. First, the UMIK-1 specs are 20Hz-20kHz +/- 1dB. And, 15Hz (of course) is subsonic and not audible, although if you have a suitably impressive large speaker or subwoofer, it's feel-able.)

Anyway, you should get a graph like this when you click All SPL:
Note that the graph has been set to 15 hz to 20.0 kHz on the x-axis and 50 db to 90 db on the y-axis.

Actually, the initial plot will look a lot more jagged. 1/6 octave smoothing (selectable via the Controls button) is typically applied.
Three sweeps are overlaid. One from the front left speaker. one from the front right. And the unsmoothed sweep is from the center channel.
Once the preferred smoothing has been selected, click "Apply to selected". Here are the response curves from all front 3 speakers overlaid. 
Red is front left speaker. Green is front right speaker. Blue is center speaker. Colors have been defaulted.
(Each time you conduct a sweep, by default it'll be plotted on top of the previous sweeps. Of course, you can choose to clear prior measurements.)

As you can see from the graph, there are some problems to be tackled. Even if you have room correction in the receiver, it'll be good to place the speakers and listening position as close to optimum as possible prior to (applying) room correction. 

Broadly speaking, my problems are: (1) there's a hump for all three speakers at 40 Hz. (2) the suckout around 80 Hz. (3) the 100-200 Hz broad bump for the center speaker. (4) the roll-off from 3 kHz on upwards for all three speakers. Could you have guessed all of these from the picture of my listening area (first picture above)? Not me. It's good to have the ability to measure the room/speaker combination!

Unfortunately, REW is not an AI program. It can't figure out the reasons for those non-linearities. To solve these one must experiment with positioning of the speakers (distances from the walls) and of the listening position (distance from the back wall). Also, one must calculate the room modes (which depend on the width, height and length of the room, assuming a simple rectangular shape).

With respect to the four problems, I've discovered so far:
  1. [40 Hz bump.] Something is responsible for the bump but it's not apparent (to me) from a simple, i.e. axial, analysis of the room dimensions. There is a good Room Eigenmodes calculator and sound pressure visualizer at [5]. Here is an example:
    Fundamental frequency standing wave representation. Dark = high sound pressure.
    Ceiling height at 12.5ft means f1 = 45 Hz because room height would be half a sine standing wave. (45 Hz is 1130 ft/sec (speed of sound) divided by 2 * 12.5 ft.) Length at 15ft means f1 = 38 Hz. It's not even clear what the room width is in my case because the left side is an open area. If I take the maximum width at 34 ft, f1 = 17 Hz, f3 = 50 Hz. There is a partial wall at 20.5 ft: if I use that, f1 = 28 Hz and f3 = 83 Hz. Doesn't coincide with 40 Hz. 
    41 Hz tangential mode for width 34ft and length 15ft 
    Looking at tangential modes, i.e. bouncing the sound waves off 4 walls instead of 2 parallel walls, there is a 41 Hz tangential fundamental mode that engages the full width, i.e. 34ft, and length of the room model. Perhaps that's what responsible for the 40 Hz hump. However, I believe that tangential modes are half as loud as (equivalent) axial modes. Most receivers have automatic room equalization built in. You can test if your receiver's auto-eq will attenuate that 40 Hz mode: surprisingly, mine doesn't seem to do anything, see below.
  2. [Suckout at 80 Hz.] A major suckout is much more worrying. Room equalization can't do anything about it because it's presumably at a sound pressure null, and increasing amplifier power at that frequency band will only have minimal to no effect. Assuming the speakers are wired correctly with respect to phase, the only thing to do is experiment with varying the speaker and listening positions. Moving the speakers didn't seem to do anything. Fortunately, I discovered that moving the seating 1 foot forwards reduced the suckout substantially.
  3. [100-200 Hz center speaker bump.] This one is easily corrected by the receiver. Perhaps it can also be mitigated by placing the center speaker higher or removing the glass table.
  4. [3 kHz roll-off.] The speakers are pointing directly ahead. Tweeters can be quite directional. Toe in mitigated the roll off.
Applying toe-in and seating changes in conjunction with my budget Pioneer's unsophisticated MCACC system resulted in the following response curves:
Green: left front speaker. Red: right front speaker. Blue: center speaker.
More work is needed but you can see the frequency response of all three speakers have been improved. 40 Hz is also the port frequency for the Sonus Faber Guarneri, so there could be some interaction with the rear wall as the port exits out back. The right speaker has higher output than the left since there is a wall to its right, and the listening area opens out to a large area on the left. Low frequency response is non-existent due to the 6-inch woofers. A subwoofer would change things dramatically below 40 Hz.

References

1. Using the UMIK-1with REW and HDMI output - Mac. http://www.minidsp.com/applications/acoustic-measurements/umik-1-hdmi-on-mac

2. Room EQ Wizard on the Mac - An input workaround. http://johnr.hifizine.com/2013/02/room-eq-wizard-on-the-mac-an-input-workaround/

3. Workaround for 8 channel HDMI out on the Mac. http://www.hometheatershack.com/forums/rew-forum/69754-workaround-8-channel-hdmi-out-mac.html

4. Getting Started with REW. http://www.roomeqwizard.com/REWV5_help.pdf

5. Room Eigenmodes Calculator. http://www.hunecke.de/en/calculators/room-eigenmodes.html