Sunday, May 4, 2008

Nodal Ninja 3 Mk II setup

See previous blog entry where I described my first spherical panorama project.

This entry is about setting up the panorama head to rotate about the entrance pupil point on the lens to avoid parallax errors.

The panorama head is a Nodal Ninja 3 Mk II. Costs about $200.

The setup described here is specific to the camera body (Olympus E-510) and lens (Olympus Digital Zuiko 8mm fisheye) shown.

Since we're shooting with a fisheye, it's not necessary to get things pixel perfect accurate to give good stitching. However, the closer one can get, obviously the less work software has to do. One can spend over $1000 to get a custom-made precision head designed for a specific camera/lens combination. However, I don't think the $200 panohead is capable of repeatable (sub-)pixel accuracy when repeatedly assembled and disassembled (without calibrating afresh each time).

Step 1

The first step involves pointing the lens straight down at the rotation point on the panorama head. We try to get the center of the camera sensor on the center of rotation.

For this, there is only one adjustment, sliding the vertical arm along the horizonal piece.

This means one must hope the tripod socket is properly (left-right) centered over the camera sensor.

On the E-510, I eyeballed all of this using the 10x liveview mode on the lcd display.

To check: took a picture. Rotated the pano head 180° and took another picture.

Download and paste one picture (rotated 180°) with 50% transparency over the other one to check how closely they match.

Overlay shown:
Close-up of previous picture:

Pretty good registration: about a pixel or so difference.
Not bad for liveview eyeballing.

Not much point in trying to do better, each time the apparatus is set up, there could be easily that much variation in it.
Note the value on the scale on the horizontal arm.
(Washer/bolts are supplied for setting stops.)

Or never diassemble it.
I also secure the rubber-backed plate that mounts to the camera tripod. And leave it attached to the camera.

(I settled on having the plate rotated 180° from what is shown above.)

Since the tripod socket is a single mounting point, there's no way to determine if the plate is truly parallel to the camera body/sensor. This is a potential setup problem.

(There'd have to be a grid printed on the bottom of the camera in order to have a reference point for the marking on the plate.)

Step 2

Next part involves setting the position of the camera body along the vertical arm to make sure we're rotating about the entrance pupil.

This can be determined by various methods to the pixel level, some involving grids, other laser beams at proposed stitching angles. Fortunately, someone has done this for the Olympus Fisheye already.

From Georges Lagarde's webpage on the lens:

"Using the focusing ring external groove location gives excellent results for six shots panos."

So I borrowed his setting.

(I've added a red horizontal line to this picture to indicate the position.)
Seems to give good enough results for me even when tested in a small room (smaller distances = bigger parallax errors).

Again, note the value from the mark on the camera plate on the scale printed on the arm.

For minimum setup time, I carry the camera body with plate attached, and the Nodal Ninja 3 Mk II assembled as shown below:

Friday, May 2, 2008

Spherical panorama photography

I've recently become interested in taking 360° x 180° spherical panoramas.

These are pictures that can be rotated in any direction. (Zooming in and out is also permitted.)

Apple's free Quicktime player works well for this purpose.


I'm actually interested in both handheld and tripod-based setups.
This blog entry will just cover using a tripod.
(The handheld part will come later.)

Here are the components:
  • A tripod. I use an ultralightweight carbon fiber/magnesium Gitzo 1155T (relevant blog entry).
    Its compactness and light weight are big plusses for hiking. However, you can use any tripod.
  • A camera. I borrowed an Olympus E-510 DSLR from a friend. (Previous blog entry on the camera here.)
  • A offset rotating bracket that places the axis of rotation around the entrance pupil of the lens to avoid parallax. The panohead I bought was the Nodal Ninja 3 Mk II. $200.

Oh, I nearly forgot. I also bought an Olympus Digital Zuiko 8mm lens. $660. Weighs about 1lb. The most expensive component here.

But this allows one to cover 360° of rotation comfortably in just 6 shots.

Assembled:
Although the camera is level here, I tilt to point the lens down nearly 15° when shooting for better coverage.

Rotate and shoot every 60°.
Add one zenith shot (for the ceiling).
And zero or more nadir shots (for the floor).

That's a total of 7 shots minimum.

Some details:
  • You can get fancier and rotate the camera as well to get the longest side, i.e. the diagonal, vertical. As a result, some people can get away with 4 shots but that's for another time when I describe the handheld setup.
  • The number of nadir shots depends on how hard it is to patch the location of the tripod.
  • Shoot aperture priority (i.e. fixed aperture), let shutter speed fall where it may. Let stitching software normalize exposure.
  • Let autofocus do its job. A fisheye typically has a large depth of field. (I haven't measured this one.)

Good software exists for arranging and stitching the shots together.

I use autopano pro. Its virtue is that it's almost completely automated. (Some tricky cases will require manual intervention.)

It produces equirectangular projections of the sort shown above. To prepare the image for Quicktime Player, I run it through pano2vr, which maps the image onto the six sides of a cube that the player needs:

Since I'm currently spending time at an architecturally distinguished building, I thought that'd make a good subject for my first panorama project.

See my webpage here for the pictures.

Also see my more recent blog entry on panorama head setup.

Tuesday, April 22, 2008

Princeton

It's funny how one can do nothing for years and then suddenly turn into a total tourist.

I lived for about 10 years in the Princeton area. Never felt the urge to take pictures.

This weekend I happened to be visiting on a beautiful spring day and had my Olympus point-and-shoot with me.

And I started snapping away for posterity...
Courtyard:

Juxtaposition of new and old:

Spring bloom of magnolias:

Well-placed trees:

Through an archway:

(Post-processed by Jim Montgomery.)

Late afternoon panorama of the garden at Prospect House (hence the light to dark transition):

Yes, it is a serene and gorgeous campus. Beautiful New Jersey.

Thursday, April 10, 2008

the imprecision of measuring devices

Question: you have multiple measuring devices, which do you trust?
(Answer is none.)

Here's the story. Today was a beautiful day. 70F and sunshine.

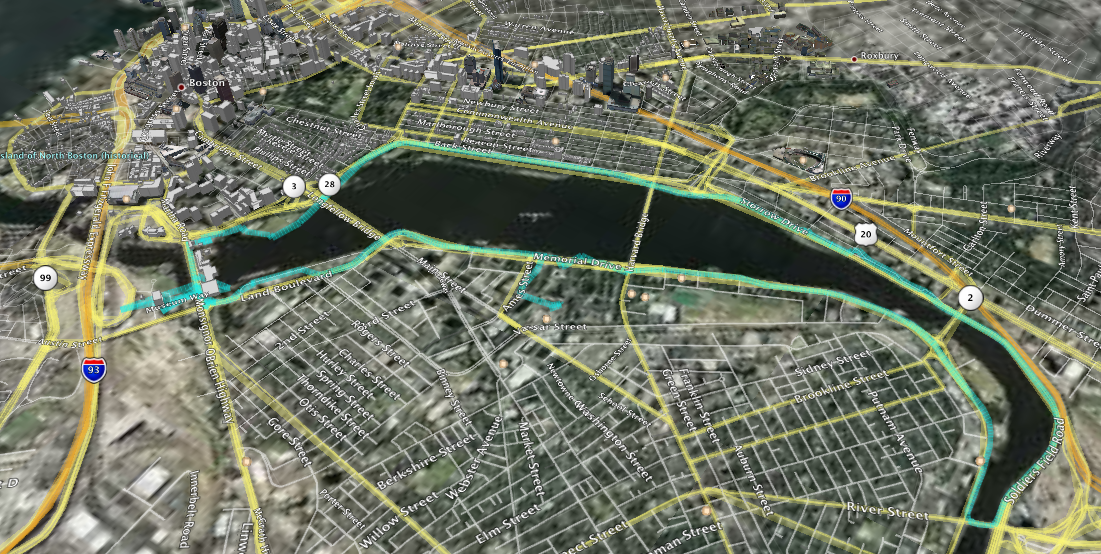
I just ran the Charles River loop between the Museum of Science and River St bridges fully instrumented.

Full image here

This is the route recorded by my Garmin Etrex Vista Cx in my back pocket. I also had my Apple iPod Nano with the Nike+ kit.

The Nano computes speed/distance by measuring foot strike time. It overestimates my distance by about 5% usually. But I don't bother to recalibrate it because it would depend on the running surface: treadmill, grass, hard mud, gravel, tarmac, concrete all affect the foot strike time differently.

Clearly, there are some issues with the GPS data points recorded. I'm pretty sure I can't run at nearly 30 mph.

Zooming in at the Museum of Science reveals some oddities:

According to the tracklog, I've been doing some impossible zipping around. Of course, we need to delete those outlier points. Google Earth then reports:

The Nike+ kit doesn't record every footfall. It saves a reading every 2 seconds and performs lots of smoothing:


Finally, there is a well-known reference guide to this course (probably obtained by someone with a measuring wheel):

Summarizing, we have:
Source Distance
(miles)
Garmin tracklog 9.66
Google Earth 8.9
iPod Nano Nike+ 8.13
My best estimate 7.6
Reference table 7.0

I didn't run the exact reference course, which is a good lower bound.

Additional mileage included running from the MIT Stata Center out to Memorial Drive. (Plus I had to double back at one point since a gate was locked.)

So I can't rely solely on the reference table.

Lesson? The GPS isn't too reliable in this urban environment. As it turns out, the lower tech device (Nike+ kit @ $30 + iPod Nano) is closer to the ground truth.

The possibility of bad track points (e.g. from interference) means that on a short run you have to inspect the GPS tracklog that's recorded. Wish there was filtering software built into the Garmin.

Thursday, April 3, 2008

Springtime in New England

It really felt like Spring today in Boston. In the fifties (F) with sunny blue skies.

A quick opportunity to get a short and leisurely 28 mile loop before temperatures plummet again and the rain moves in.

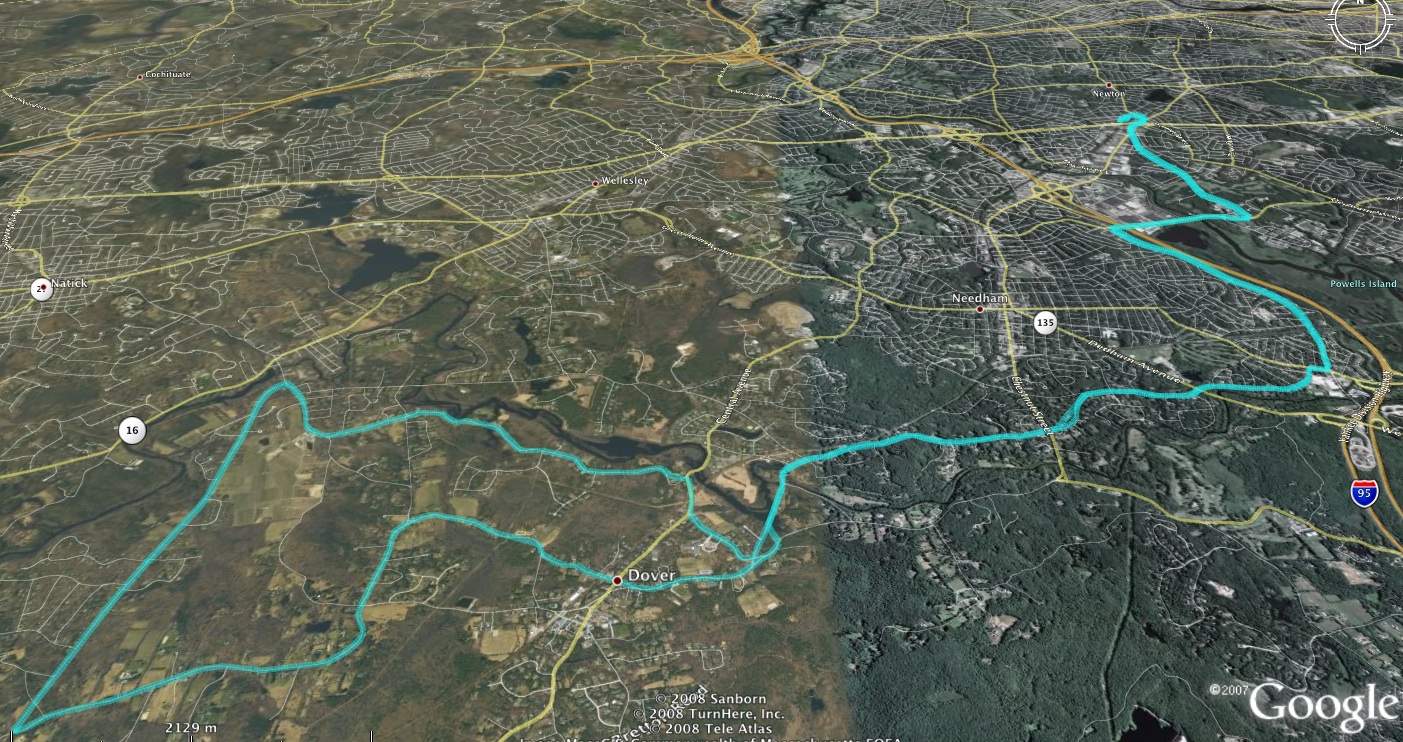
Unlike out west (Arizona), New England has the advantage of having a dense network of backroads. Given local knowledge, it's possible to put together a beautiful and relatively traffic-free ride in a major metropolitan area. A friend, Pete Hausner, showed me one such route from his place in Newton.

With a Garmin etrex Vista GPS receiver in my jersey pocket, I recorded the route for posterity (here mapped on Goggle Earth):

(Click here for a larger view.)

The satellite imagery really gives a nice idea of the surrounding urban density and green areas. (Notice how we skirted around Needham.)

And despite near total unfamiliarity, I can use the recorded tracklog again. With the street level mapping capabilities of the Etrex Vista, I can now re-ride the loop and not miss a turn anytime I want:

Thanks Pete!

Tuesday, March 11, 2008

How do you know when you're really in Boston?

I'm here in Boston for six months.

I've been here since January.

But at what point does it really hit home?
  1. When you get your first parking ticket?

    You're parked in a metered spot. But you didn't notice the first Tuesday of the month there's no parking between 2am and 6am. Eh. At least you can pay online.
  2. When you hit a pothole big enough to take out your front tire?
    (No pics. But it was dark and late at night in Medford. Coming around a corner. Wham!)

    Whacked the tire hard enough to put an (unrepairable) hole in its sidewall. $166.
    Bonus points: when AAA tells you it's the third one on that pothole that night.
  3. A parking space right in front of the entrance for China Pearl on Sunday for dim sum.

    When you realize the chances of find such a space in Chinatown is essentially the same as winning the state lottery.
That's when you really know you live in Boston...

Ski: Stowe VT

I've always wanted to go back to Stowe VT. It's been stuck in my memory for a long time.

Many, many years ago, I was a total beginner (not that I'm particularly good now), I once went with some fellow students. I remember being completely terrified of the steep trails and drop offs. I think it was my first time seeing anything really steep. Very much out of my depth. Obviously I survived. But it made a deep and lasting impression in my mind for decades.

I finally got to revist Stowe for a day. Unfortunately, I didn't pick the best of times. It had rained hard all day Saturday making conditions miserable. Just a few flakes on Sunday in northern Vermont. To make the most out of bad conditions, I ended up at Stowe.

Monday, the day of my visit, it was windy and really cold. A thermometer read 5F (-15C) inside the building at the top of the Gondola.

(A big contrast to the previous weekend when I had the lucky opportunity of visiting Okemo with two feet of snow.)

Back to Stowe, trails served by the Foreunner quad seemed rock hard and icy, and not much fun. So I only did Nosedive before retreating to the warmth and more pleasantly skiable terrain served by the Gondola.

As for the steep dropoff that had me quaking? I never found the spot.

Though since I'm sure my mind spent decades embellishing that memory, I could have skied right past it on Monday sans recall. (I didn't see anything really steep served by the Gondola.)

I'll close this entry with a few pictures of Nosedive on ice on Monday: