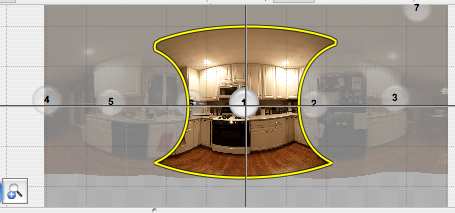
See previous blog
entry where I described my first spherical panorama project.
| This entry is about setting up the panorama head to rotate about the entrance pupil point on the lens to avoid parallax errors.
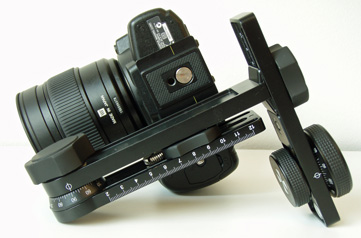
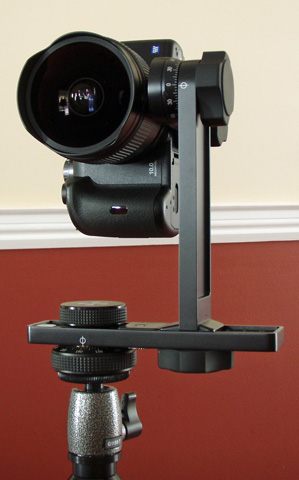
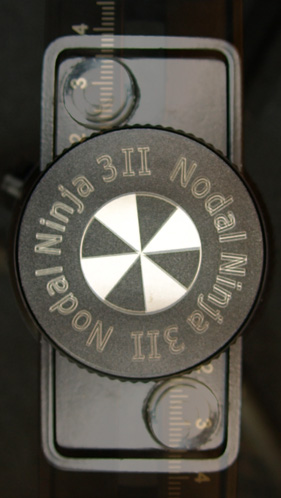
The panorama head is a Nodal Ninja 3 Mk II. Costs about $200.
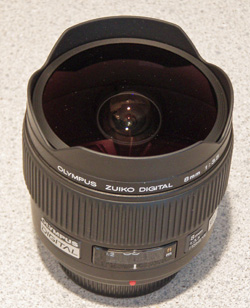
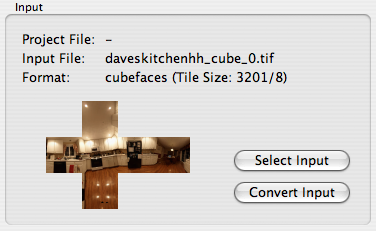
The setup described here is specific to the camera body (Olympus E-510) and lens (Olympus Digital Zuiko 8mm fisheye) shown.
|
 |
Since we're shooting with a fisheye, it's not necessary to get things pixel perfect accurate to give good stitching. However, the closer one can get, obviously the less work software has to do. One can spend over $1000 to get a custom-made precision head designed for a specific camera/lens combination. However, I don't think the $200 panohead is capable of repeatable (sub-)pixel accuracy when repeatedly assembled and disassembled (without calibrating afresh each time).
Step 1
The first step involves pointing the lens straight down at the rotation point on the panorama head. We try to get the center of the camera sensor on the center of rotation.
For this, there is only one adjustment, sliding the vertical arm along the horizonal piece.
|
This means one must hope the tripod socket is properly (left-right) centered over the camera sensor.
On the E-510, I eyeballed all of this using the 10x liveview mode on the lcd display.
To check: took a picture. Rotated the pano head 180° and took another picture.
Download and paste one picture (rotated 180°) with 50% transparency over the other one to check how closely they match.
Overlay shown:
|
 |
Close-up of previous picture:
Pretty good registration: about a pixel or so difference.
Not bad for liveview eyeballing.
Not much point in trying to do better, each time the apparatus is set up, there could be easily that much variation in it.
|
 |
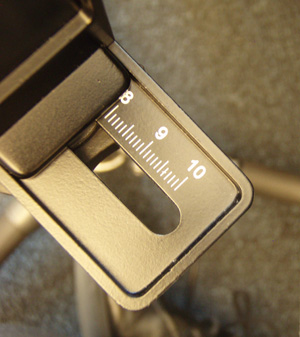
Note the value on the scale on the horizontal arm.
(Washer/bolts are supplied for setting stops.)
Or never diassemble it.
|
 |
|
I also secure the rubber-backed plate that mounts to the camera tripod. And leave it attached to the camera.
|
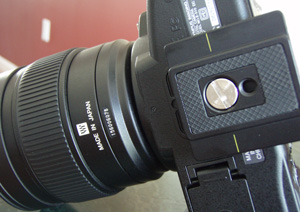 |
(I settled on having the plate rotated 180° from what is shown above.)
Since the tripod socket is a single mounting point, there's no way to determine if the plate is truly parallel to the camera body/sensor. This is a potential setup problem.
(There'd have to be a grid printed on the bottom of the camera in order to have a reference point for the marking on the plate.)
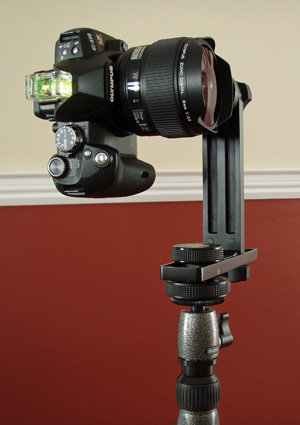
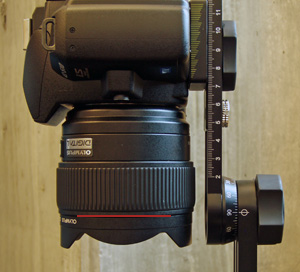
Step 2
Next part involves setting the position of the camera body along the vertical arm to make sure we're rotating about the entrance pupil.
This can be determined by various methods to the pixel level, some involving grids, other laser beams at proposed stitching angles. Fortunately, someone has done this for the Olympus Fisheye already.
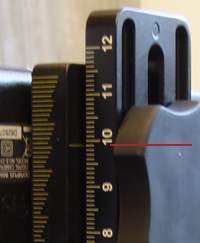
|
From Georges Lagarde's webpage on the lens:
"Using the focusing ring external groove location gives excellent results for six shots panos."
So I borrowed his setting.
|
 |
|
(I've added a red horizontal line to this picture to indicate the position.)
|
 |
|
Seems to give good enough results for me even when tested in a small room (smaller distances = bigger parallax errors).
Again, note the value from the mark on the camera plate on the scale printed on the arm.
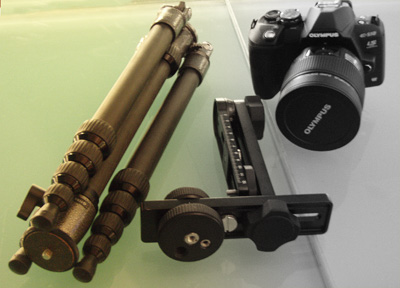
For minimum setup time, I carry the camera body with plate attached, and the Nodal Ninja 3 Mk II assembled as shown below:
|
 |