Saturday, December 27, 2008

BMW G 650 GS: dropping the bike

This is just my 2nd dirt road adventure.

And boy, did I come unstuck on this ride. I have no off-road skills and it shows.

First time around, I took the bike on Oracle Control Rd (a dirt road) up to Mt Lemmon and came down the Catalina Hwy (paved). Did fine. See blog entry here.
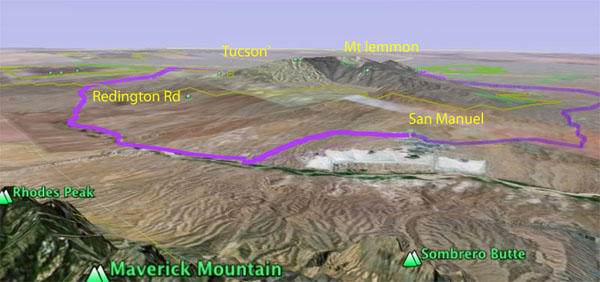
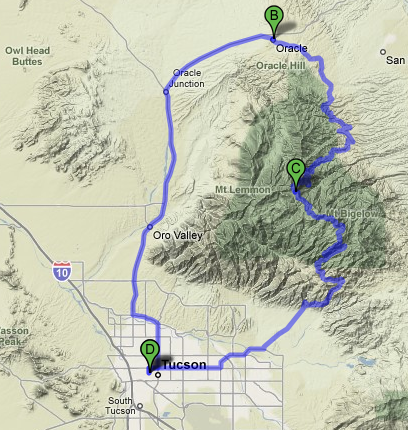
This time I ventured out on a loop north past Oracle on Route 77, then right onto a dirt road into San Manuel, then down more dirt and a few switchbacks (where I came unstuck) on Redington Rd (also a dirt road) back into Tucson. A 100 mile loop. See GPS track below:

It began as a bright but fairly chilly morning (3-5C). Hardest problem seemed to be clothing selection.

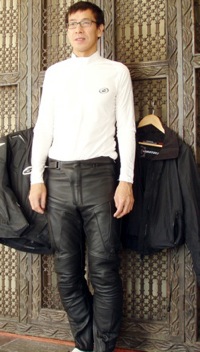
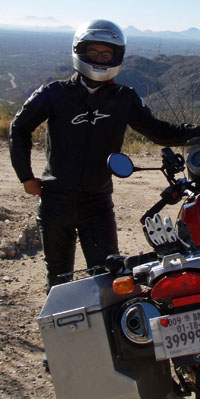
Tried a FirstGear 90W heated liner (right), substituting it for the regular liner that comes with the Alpinestars RC-1 jacket (left). Base layer was a polypro Performance cycling jersey.

The battery had to be wired for the electrically heated jacket liner. This involves taking off the turn signals and all the plastic panels on the bike to get access to the battery. There were clear instructions in the BMW manual.

A 2 hour careful install for me. You could probably do it in 20 minutes.


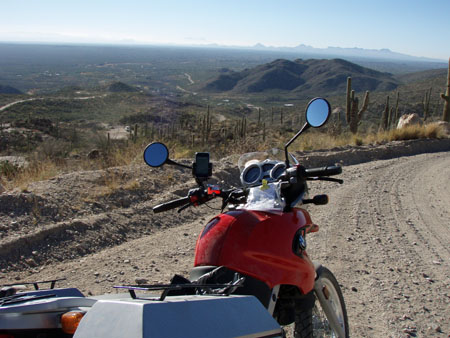
Taking desert dirt roads affords vistas and serenity unavailable to those on paved roads. An example:
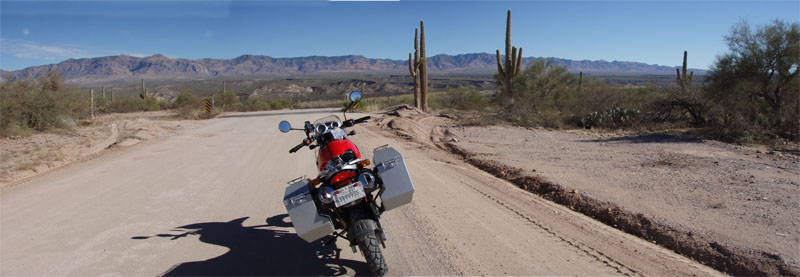
[On the dirt road to San Manuel.]
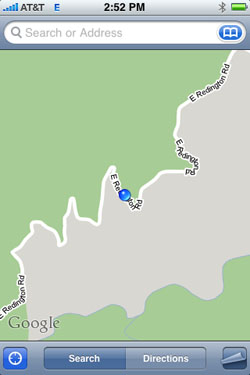
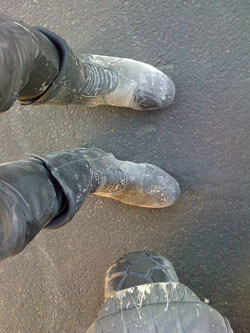
I almost made it back into Tucson when I crested the top of Redington Rd and on the way down these hairpins turns were the only obstacle between me and Tanque Verde Rd (paved).

On my earlier ride on Oracle Control Rd, the dirt switchbacks posed no problems. But that was going up only.

Coming down was a totally different matter.

When the front wheel just slid out from under me on a descent, that was the first real indication that I didn't know what I was doing.

I was in first gear with throttle closed. Maximum engine braking. It was steep and a little bit loose. I was also a bit intimidated with the momentum the bike still appeared to be picking up. Finally, there was also a tight switchback at the bottom to be negotiated. So I braked. And whoops! Bike down.
[After picking up the bike for the 2nd time.]
I picked myself up, killed the running engine, picked up the bike and switched off the ABS braking, only to immediately wipe out on the following loose gravel/sand turn when I braked again. We're talking first gear here, max 10-12 mph.

The aluminum Jesse bags saved the bike from any damage each time. Now that I've dropped the bike on consecutive descents (into a 180° turn), any confidence I had had evaporated. I was simply incapable of figuring out how to slow the bike further and not wipe out at the same time.

(Only silver lining here: I can pick up a 450 lb motorcycle lying on its side. Had my doubts beforehand.)

Hmm, how do I get down there without further mishaps?
I decided to "walk" the bike down the next hairpin. That was another mistake. It was a titantic struggle against gravity to try to arrest 450 lbs of machinery from not sliding and falling over on loose gravel on a 15% slope. Ended up totally drenched with sweat. And only getting 30 yds down the dirt road.

The next hairpin didn't appeal to me either but I was so tired I decided to sit on the bike and literally inch it down while stabilizing the bike with both feet on the ground. It wasn't pretty. Another 20 minutes. And another 50 yds. I'm ready to bonk now.

An hour after my first mishap, I was finally to ride the rest of the dirt road as it had gotten less steep.

Conclusion: I gotta get myself some off-roads skills before I try coming down Redington Rd again.

And not use that front brake. Every time I squeezed it the bike fell.

Monday, December 22, 2008

Weight loss and dieting

I spent the Fall semester preparing for the Tucson marathon in December (exercise) and actively trying to lose weight (dieting).

The general claim is that:
In general, for every 1 percent loss of body mass, primarily as body fat, there will be an approximate 1 percent increase in running speed.
[Ignoring resting oxygen consumption, the energy cost of horizontal running is 0.2 milliliter of oxygen per kilogram of body weight per meter per minute (ml O2/kg/m/min).]

Sounds good to me: free speed.

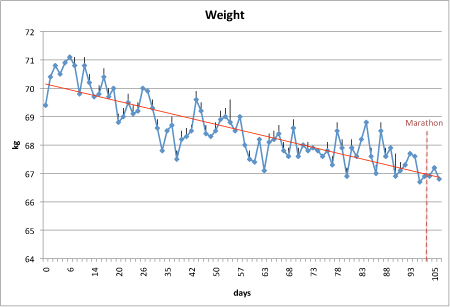
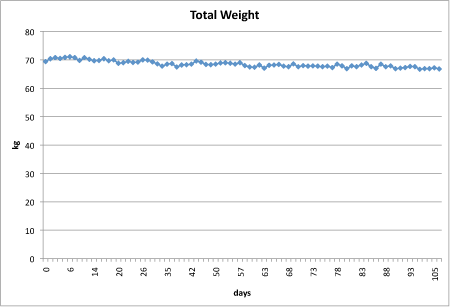
I started nearly 100 days before the marathon. And ran 25-30 miles a week. At the same time, I tried to restrict my calorie intake. The results?

See the weight chart below.

Also see my marathon report here.)

I basically cut out about 25% of my usual kcal intake. I found it pretty hard to do.


Until I hit my mid to late thirties, I never needed to diet. Training for an event by itself was more than enough to get me a single digit body fat percentage. Those days are clearly a thing of the past. Now it takes tackling it from both angles for the scale to even begin budging.

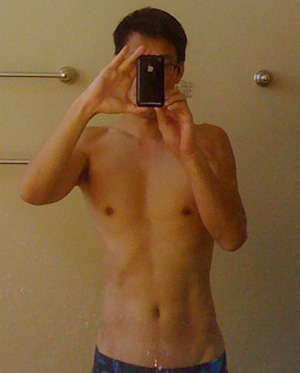
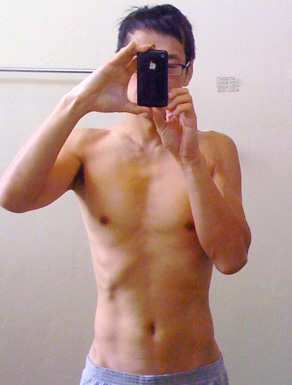
I assiduously recorded my weight (charted above). I also took proverbial bathroom pics at regular intervals to track physiological changes.

Halfway through the 100 days:

Compare with after 100 days below. Clearly, there is a large improvement (more skeletal structure is visible):

Unfortunately, graphs can be misleading. If you look at the percentage loss as a function of entire body weight, it seems like a lot of effort for very little loss:

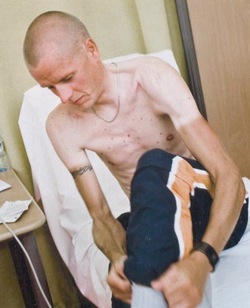
And compare my body fat and unnecessary musculature to a professional cyclist, one of the strongest climbers in the world who puts out an insane amount of power (one who was about to win a recent Tour de France before being tossed for circumstantial evidence of performance-enhancing drug use). Rather impressive diet plan:

Clearly, I'm not even close to being in the same ballpark. My mind boggles at his obvious total dedication.

I think I could stand to try harder next year...

Friday, December 12, 2008

another year: another post-marathon blues

I ran the 2008 Tucson Marathon this past Sunday.

It's my second attempt at Tucson.

I first ran it two years ago, establishing a true baseline time for my first year as a runner: 3:51.

(See off-blog write-up here to see why.)

The course is a bit different this year, finishing up in the town of Catalina instead of Oro Valley:
[At mile 26. Nearing the finish line. Picture courtesy of Jim Montgomery.]


I'd say it was definitely harder due to the rolling terrain to the BioDome and back out to Oracle Rd. And I finished with a better time: 3:41.

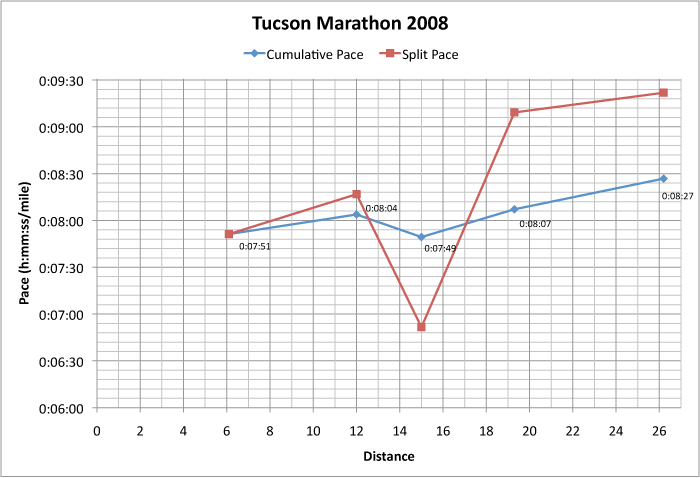
Still I'm disappointed. Why? Well, look at my split times:

I was on 8:07 pace until mile 19.3. Then I started walking and hobbling alternately for over an hour until the finish. And that put my finishing pace in the toilet, so to speak. But this wasn't meant to happen this year. I thought I'd fixed that.

Last year, I was bummed because despite training specifically for a marathon, I was shocked to have gone improbably slower in Phoenix (3:56) than my first attempt at Tucson - which I didn't do any marathon-specific training for. (See PF Chang post-mortem lament here.)

This year I'm bummed because 3rd time around I thought I had fixed the PF Chang problems: specifically, an inadequate number of long runs.

In short, I believe I trained well this year. I always start at the end of August (beginning of the Fall semester). Indications were excellent. I met my weight-loss goals: I was lighter than in the previous two seasons. PR'ed every one of my training runs by a significant margin. Faithfully showed up at the midweek training runs. Completed all the weekend long runs except one.

Unfortunately, I did pick up an overuse injury in my lower right leg 4 weeks before the marathon, which I traced back to an over-exuberant training week back in October in which I ran 6 days in a row. That week I was running so well, I decided to run extra. Yeah, it was stupid. I blame the endorphins.

However, I was careful to rest my injured leg. I basically cut out all training runs except the long weekend run. And I was able to complete those. I thought I had kept my endurance.

And for the first 18 miles of the Tucson marathon, I was going exactly as well as I had predicted. Just over the 8-minute mile mark. I wasn't stressed. I was steadily running a minute-a-mile faster than 2 years ago. (In fact, I'm pretty sure I could have gone a bit faster.)

And then I fell apart all of a sudden. I went from running to walking. I had plenty of glycogen left. After all, I was quaffing strawberry cliff bloks like candy. No bonk possible.

But then I started feeling my injured leg stiffen a bit. That's not so bad I thought: I can manage one dodgy leg. But then my uninjured leg started cramping and seized up. Electrolytes perhaps? Anyway, the result was another meltdown:

Sigh. How many years will it take? When will I get the training and race day execution right?

A few things are clear:
  1. I need to find a training program where I can pile on the miles and not get frustratingly injured. Injury is definitely a limiter in marathon training.

    (Someone just told me about Jeff Galloway's run/walk philosophy.)

  2. Maybe I need a running season longer than just late August to December, i.e. come in with more base.

  3. I could do with some speedwork. I only managed one speedwork session all semester.

Until next year when I get to try this all over again...

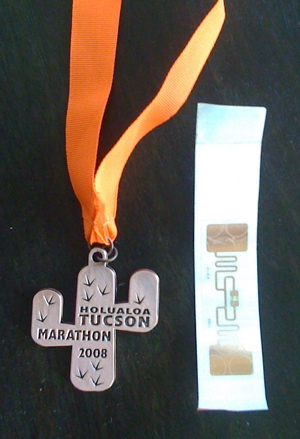
P.S. This year, they had disposable timing chips. Just a printed label that wrap around the shoe laces:

No need to cut the chip off at the end of the race. The underside contains just a simple induction loop:

ATGATT

As a new motorcycle rider, I'm acutely aware of the statistics mentioned in the Arizona Motorcycle Handbook:
More than half of all crashes occur on motorcycles ridden by the operator for less than six months.
No citations. But I guess these and statistics much like the following one:
In single vehicle accidents, motorcycle rider error was present as the accident precipitating factor in about two-thirds of the cases.
originate from the 1981 Hurt study funded by the NHTSA about Los Angeles area motorcycle accidents.

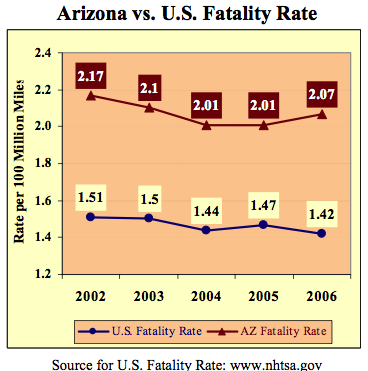
And you'd think the great state of Arizona with its vast emptiness would have a low accident rate. But it's perineally in the top 3 or 4 when it comes to fatality rates, see official stats for 2006 below (and 3rd worst state for cyclists):

As a newbie on a brand-new bike with questionable skills, clearly the odds are not in my favor. Moreover, given:
Most crashes happen on short trips (less than five miles long), just a few minutes after starting out.
the only logical conclusion is All The Gear All The Time (ATGATT).

And All The Gear means street clothing and jeans which provide essentially zero protection (even against sliding) are out no matter how short the Starbucks trip. You can seriously hurt yourself falling off at 25 mph. Ask any road cyclist with lots of scars, e.g. me. (BTW, it's possible to google and find pictures of even kevlar-reinforced jeans wearing through on 30-40 mph get-offs.)

Instead, it makes sense to have head-to-toe coverage of body parts against abrasion on tarmac from the use of motorcycle grade leathers and impact mitigation in the form of body armor.

From the wikipedia entry on Motorcycle Safety:
One of the main reasons motorcyclists are killed in crashes is because the motorcycle itself provides virtually no protection in a crash. For example, approximately 80 percent of reported motorcycle crashes result in injury or death; a comparable figure for automobiles is about 20 percent.
In other words, if I come off that motorcycle, chances are, I'm getting hurt.

Of course, accident avoidance through vigilance, formal training and practice are paramount, but ATGATT is the only backup left when an unfortunate chain of events happens, either through operator error - be it brain fade or inadequate skill - or because of circumstances beyond my control - automobiles violating the motorcyclist's right of way being the most common cause of motorcycle accidents.

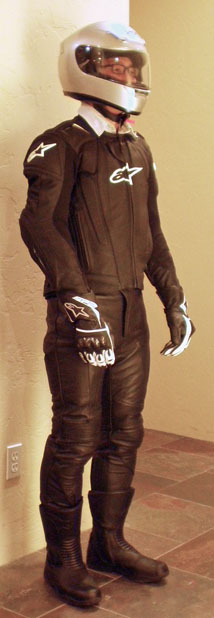
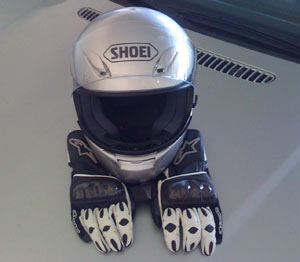
Okay. My gear? Here's what I came up with given a combination what was locally available to try on and internet shopping. (Since fit is critical for optimal safety, I bought everything locally except for the pants.)

I appear completely overdressed and totally uncool compared to the majority of riders I see in Tucson on their sportbikes but I believe this gear should have significant advantages. Here is a breakdown:

Equipment Description Cost
Helmet Shoei RF-1000. Size S. The middle helmet of their full face line. Has reinforced fiberglass, sophisticated venting/anti-fogging and comfort features.

Must fit tightly yet be comfortable. Squishes my cheeks.
$360
Jacket Alpinestars RC-1 jacket. Size 48. Full-grain 1.2-1.4mm leather. Elbow and shoulder armor. Soft chest protector.

Surprised only a foam back pad included. Yet has an aerodynamic hump. Go figure.
A higher-end model than I'd set out to buy, but at the local store they had a special order error. Came in my size, european 48 (really small). As a result, it was on sale for $100 off.

I added a hard Dainese spine protector ($79).
$400 + $79
Pants Alpinestars Bat leather pants. Size 48 (american 32). Has soft knee protectors and a couple of other minor bits of padding only.

Hmm, Alpinestars doesn't claim full-grain 1.2-1.4mm leather for this model. Nor does it have any cushioned hard plastic protectors. But it does integrate with the RC-1 jacket - they zip together - and it was on close-out at $100 off in my size.
$180
Boots Alpinestars Web Gore-tex leather boot. Shin guard. Toe and heel bits. Minimal ankle protection.

I worry about the ankle protection here and there is nothing in the back either. But it's a lot less expensive than fully-featured race boots, which are probably uncomfortable to walk in.
$169
Gloves Alpinestars SP-2 full-grain leather gloves with extended wrist protection. Has carbon-fiber knuckles. And finger knuckle protection. $89

I am not going to total this up :-)

Despite the cost, apart from the jacket, surprisingly nothing is quite top-of-the-line in terms of armor etc.

(And, I forgot to include my Nathan safety vest for nighttime riding. Well, that was $25, a veritable bargain.)

Despite the sticker shock, I'd much rather spend $1K on safety gear than $1K more on the motorcycle. Still, the cost involved is only slightly less frightening than the prospect of a motorcycle accident without such stuff.

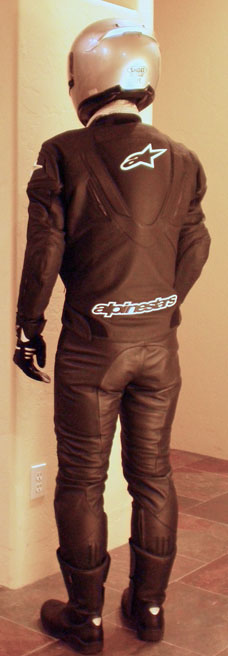
A view of the cosmetic (?) aero hump, wonder if it offers any additional protection:

Finally, not only does it look supremely dorky, I'd like to point out none of this is especially comfortable to walk around in either.

First, everything is pre-curved for the riding position down to the knuckles. Secondly, it all weighs a ton - well, I checked this morning on my bathroom scale:

Description Weight
Me 66.9 kg (147 lbs) - post-marathon bonus.
plus base layer 67.2 kg (148 lbs)
plus ATGATT 76.0 kg (168 lbs)

That's 20 lbs of motorcycle gear! And I hope I never need it.

BMW G 650 GS: One week anniversary

I bought a motorcycle for commuting last week, see previous blog entry.

One week later, I took it for its first non-commute ride to celebrate my first week of motorcycling. Mt Lemmon was the destination.

From Tucson (2595 ft). Ascended the back side of Mt Lemmon (peak: 9157 ft) to the village of Summerhaven (around 8000 ft) using the unpaved and unmaintained Control Road from Oracle. Basically dirt, mud, some snow and rocks. In parts, just one lane wide: hence the name "Control Road". Nothing that would faze an experienced rider, but it kept a beginner like me fully occupied keeping it rubber side down on some muddy/rocky 180° turns. Another first down: a non-tarmac experience.


After a traditional slice of pie at the Mt Lemmon Cafe in Summerhaven just before it closed at 4pm, it was down the well-paved and maintained Catalina Highway back into Tucson. The (standard) heated grips came in handy.

Still learning how to ride, I corned gingerly with not much throttle roll-on. At the low speeds I'm currently employing to avoid overcooking a corner, it feels a little strange.

Having descended the Catalina Hwy many times flat-out on my road bicycle, barely braking even for the 180° hairpins, everything feels much more deliberate and ponderous on the motorcycle. Maybe it's due to the environmental isolation afforded by full motorcycle leathers, gauntlets and full-face helmet compared to polyester/lycra and a helmet with more holes than a kitchen sieve. But it actually seems less fun.

Total: a scenic 100 mile loop.

[D: University of Arizona, C: Summerhaven. B: Oracle.]

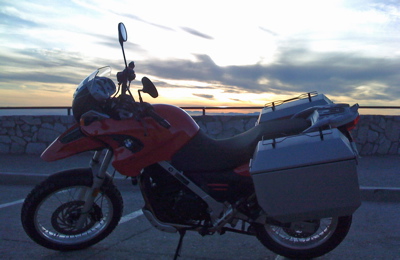
A brief stop halfway down at Windy Point on the Catalina Highway to admire the sunset:

Thursday, December 11, 2008

BMW G 650 GS

A week after taking the MSF Basic RiderCourse and getting my motorcycle endorsement, I bought a BMW G 650 GS dual purpose motorcycle for commuting.

Versatile. I've found it can do dirt roads comfortably as well as paved ones. It has significantly more suspension travel than pure street machines (6.7" F, 6.5" R) plus suitable tires. In any case, in off-road situations, the limiter is clearly me.

Insurance is many times cheaper than a car and parking fees are also but a fraction of the cost for a car at the University. No more driving to work. Either a powered or a pedal bike instead, depending on whether I have a workout scheduled for that day.

It happens to be the simplest and least expensive motorcycle that BMW makes. It has a single cylinder engine, a thumper, displacing 650cc. The engine is outsourced to China for cost-savings. Primitive, reliable and hopefully cheap to maintain, though it does have modern-day EFI (electronic fuel injection).

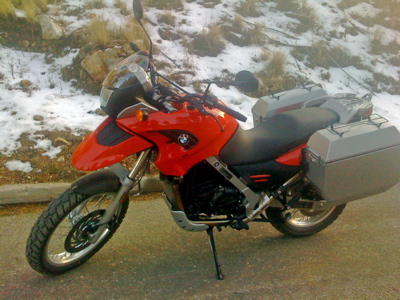
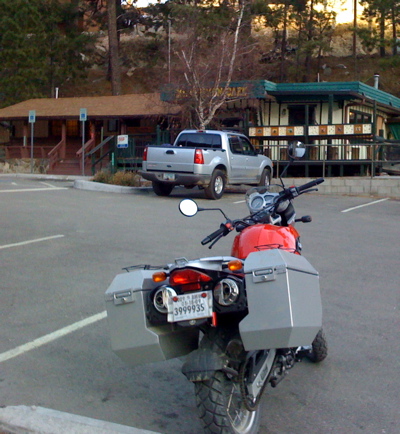
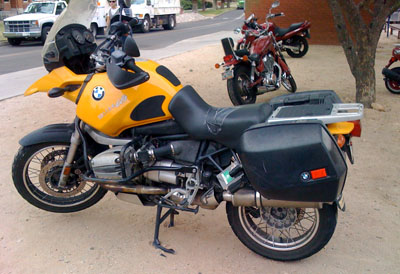
Heated grips for winter and ABS (not yet commonplace on motorcycles) are two notable features that come standard. The aluminum Jesse bags shown above were an option installed by the dealer. Mine also came with a centerstand.

More importantly, it only has 53hp and is not super-heavy at 387 lbs (dry) and 425 lbs (wet). After all, I'm a motorcycling newbie. Still, I'm not sure I can pick it up. And with a seat height of 30.7", unusually low for a dual purpose motorcycle, I can actually touch the ground with both feet (not completely flat footed though). (I don't have the optional lowered suspension and seat, which drops the height even further to 29.5".)

[A couple of weeks after I bought mine: reviews started appearing in the press, e.g. Motorcycle.com and motorcycle-usa.com.]

Iron Horse Motorcycles had two 2009 G 650 GS bikes: one in red, the other in black. I was offered a test ride. It was the first time I've actually ridden on a road. My only other experience on a motorcycle was the MSF course mentioned earlier in a parking lot, see previous blog entry.

I need urgently to practice and improve on the skills learnt in the Basic RiderCourse. On the evening I took it home, at the tail end of rush hour, I took it very gingerly and only stalled it twice. My friend Jim drove sweep using his Dodge Caravan to keep cars off my tail. The next morning I took it solo into rush hour traffic for my 30 mile round trip commute. Trial by fire if you will.

Nearly one week in I have 210 miles on the odometer. I've dropped the motorcycle twice on its side at 0mph in parking lot situations due to the engine conking out before I could completely bottom out the clutch lever (an adjustment in order perhaps?). Extremely embarassing but I've learnt when the revs get low, the thumper conks out. In both cases, the aluminum bags saved the bike from damage. I'm learning quickly I think. But it's only week one.

Tuesday, November 25, 2008

MSF Basic RiderCourse

I took the $280 15 hour Motorcycle Safety Foundation (MSF) course this past weekend at Arizona Honda.

[Purchased the day before the course.]

And picked up my motorcycle endorsement a day later at the DMV.

Surprisingly, unlike other places, there is no progressive engine capacity restriction in the United States. And you don't even have to take this excellent course, so bad habits etc. might not get corrected. I say: what a country!

Motorcycle skills take time to acquire. Maybe a lifetime to perfect. So I'm looking to get a beginner machine and work my way up.

The classroom study led by the instructor (5 hours) is of course just common sense sound advice. No tricks. 50 questions on the exam. I believe there were 10 people in my class. I think there were only two wrong answers in the whole group, i.e. the class scored 498/500.

Out on the range, it was a bit less straightforward. I drive a stick shift car and I have ridden a road bike for many years. So I'm very familiar with the principles. But that's all theoretical, I've never actually ridden a motorcycle before. Muscle memory-wise, it was both harder and easier than I'd imagined.

Glancing at the MSF webpage,there's about 10 hours of practice exercises and a 4-part test. There were two instructors, euphemistically referred to as "RiderCoaches". Our group of 10 were divided between them for instant feedback aka "coaching".

It is quite grueling actually if you think about it since the total time spent (excluding travel time) is 15 hours over just 2 days. It's still fairly hot and dry out here in Tucson in late November (28C), lots of water needed, and we finished each day just as the sun was setting.

[Waiting to be called to review our tests at the end of day 2.]

(Unfortunately,) you get to use the same bike on both days:

I truly hated my Honda Rebel. It wouldn't go into neutral unless I used the kill switch, and randomly balky into 2nd. Pretty sensitive throttle with a lot of slop. I guess these range bikes were a little beat up.

Moreover, I disliked the ergonomics of the Rebel. I could not reach the front brake with all four fingers (required), and the lever's reach was not adjustable. The seat was painfully wide, seemingly designed for a wide load only. The handlebar height was wrong for maintaining a horizontal/straight wrist. Seat height was commendably low though.

The instructors (Ray and Ron) were truly excellent though. Serious and professional. I got my money's worth. They jumped on errors immediately, hammered me mercilessly for every sign of an emerging bad or sloppy habit, spotted every moment of throttle hesitation or roll-off through a corner, and critiqued every wobble no matter how small. (My biggest problem turned out to be looking down: either at the controls or the cones - especially during the slower-than-walking-pace small box double u-turn maneuver.) I can't imagine learning anywhere near this fast on a cul-de-sac somewhere and of course bad habits would have developed unchecked in that case.

By contrast, the test for the license (at the end of the 2nd day) is rather hard to flunk. You have to have more than 20 points deducted or drop the bike to fail. But that's not the point. Over the two days, I had gone from zero to a lot of new skills.

My personal notes? Let's see. No deductions for the figure of 8 u-turn test, i.e. no foot down or maneuvering outside the box. The swerve test turned out fine (eventually). I lost 2 points on the brake test (2 ft further) - I had managed to lock the rear of the Rebel in practice. And I lost 5 points on the timed curve for slowness though I was told my technique was perfect. So 93/100 for 3rd place in my group of 10. And I came out with a lot of respect for the skill of the motorcyclist who make things look easy or has beautiful technique.

The Southwest is a great place to ride a motorcycle. Distances are larger than what I can do on a road bike. For instance, 300 miles would literally take me all day on a road bike.

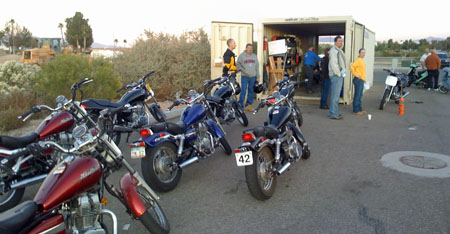
And every day, I see so many motorcycles being used for commuting - Americans no longer taking cheap gas for granted - though I can only see myself commuting on one if I have a running workout scheduled for the same day. Today, I spied these 8 motorbikes parked just behind the building I work in:


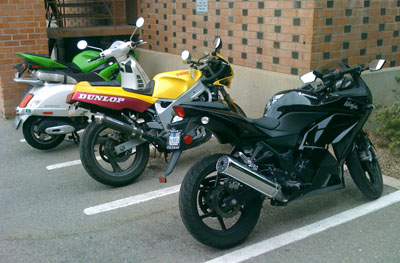
And they got me thinking about what kind of motorcycle I want. On some days, there is even some pretty exotic machinery...

Thursday, November 20, 2008

Nike+ iPod Nano and wireless headset

Over the last couple of years, I've been in search of my personal holy grail in terms of running-related gadgetry. In short, I've been looking for:
  1. the lightest and most compact iPod that
  2. supports the Nike+ sensor/running shoe hardware, and
  3. supports the use of a wire-free, sweatproof stereo headset
Before I describe the solution, let me briefly explain why this is hard to do.

Currently, only two members of the iPod family support the Nike+ sensor: the Touch 2G and the Nano (I have a 2G model). The smallest iPod is the Shuffle but it doesn't work with Nike+. The iPod Touch 2G comes with built-in support for Nike+ but is considerably more bulky than the Nano, plus I already have a iPhone 3G which is basically the same hardware as the Touch 2G plus a phone (and GPS). Unfortunately, the iPhone is not Nike+ compatible.

Next problem: the Nano doesn't support wireless stereo because it doesn't have a bluetooth chip. Actually, none of Apple's iPod/iPhone models can play music wirelessly even if the model happens to have bluetooth. Go figure.

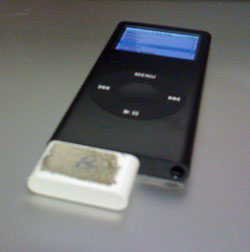
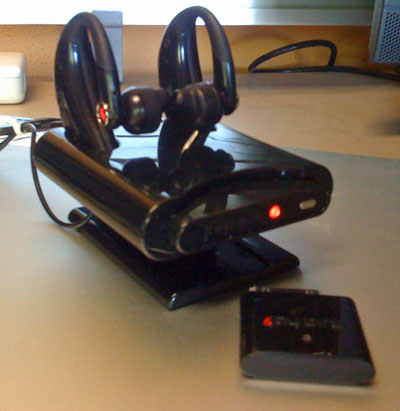
This means a separate bluetooth dongle is necessary. Fact: there is only one dock connector per iPod. The Nike+ receiver uses the dock connector. The iPod Touch 2G has the Nike+ receiver built inside, freeing the dock connector for a bluetooth adaptor, but the Nano needs to have the Nike+ receiver plugged in at the bottom. Unfortunately, the headphone socket is also next to the dock connector at the bottom of the Nano. Severe competition for limited space:

I settled on a refurbished, i.e. 40% off, Jaybird JB-200 headset. It is sweatproof (very important for long-term use). It may also be ordered with an iPod-specific or a generic headphone plug dongle. (I got both.) It also has a microphone for regular bluetooth headset functionality. And mostly importantly, it also claimed a useful 5 hours of battery life, comfortably long enough for a marathon.

Even at a discount, these things are by no means cheap. And bluetooth's limited bandwidth does not make for audiophile or critical listening quality, but when I'm running do you think I care? (There are high-fidelity headsets based on Kleer's proprietary wireless system but they don't advertise sweatproofing and there are other downsides.)

Funny thing happened inbetween my placing the order and receiving the product. iLounge came out with a negative (C-) review. Given the cost, if it had come out a few days earlier, I probably wouldn't have ordered.

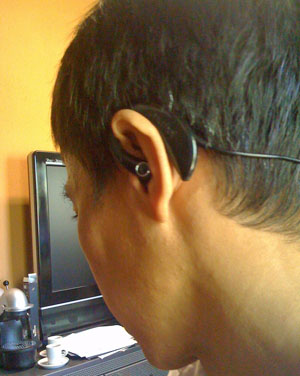
The headset is a bit fiddly but stayed securely put on my midweek ten mile run. And it's wonderful not to have wires to snag and yank your earbuds out.

There is a wire that connects the receiver on the right side to the left side. I had to shorten it using a tie-wrap so it wouldn't drag on my neck and interfere with head-turning.

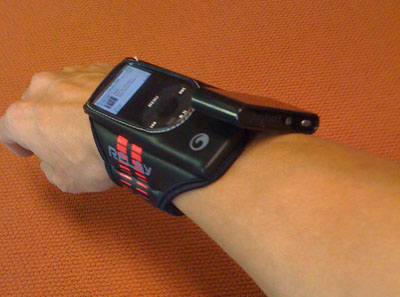
The generic Jaybird dongle is plugged into the Nano 2g earphone socket with the Nike+ receiver inside my Marware Sportsuit Relay case (which doesn't appear on Marware's website anymore):

The Marware case is wonderful because it allow the Nano to be wrist-mounted - which is more comfortable than bicep-mounting - and is specifically designed to hold the Nike+ receiver as well. Since we've gone wireless, the constant flicking of the earphone cable is no longer a problem.
The generic dongle is about twice the size of the iPod docking connector dongle because headphone sockets don't supply necessary power, so it needs to have an internal battery. The combination looks rather unwieldy but crucially doesn't interfere with running.

Bluetooth reception from the wrist is excellent without annoying interruptions. (Placed in a pocket, you will get dropouts as body parts may temporarily block the signal while running.) Sound quality is running compatible: certainly, the Nike+ voice announcements come through loud and clear, and music does not require a low noise floor given labored breathing.

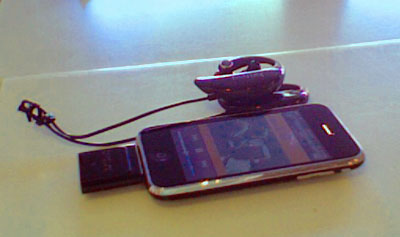
As for the iPod-specific dongle, I use that with my iPhone 3G for music only. The built-in bluetooth of the iPhone is only for calls.

There are a lot of pieces to lose. Here is the docking station for charging both the headset and the generic bluetooth dongle:

UPDATE: November 24th, I had some problems with the increase volume button, it seems stuck on, As of November 25th, the headset is dead. It charges (red light goes on and then off), but it doesn't turn on anymore.

Saturday, November 15, 2008

The desert and dynamic range: spherical panorama photography

I blogged about hiking on Pusch Peak back in April 2007):
It's hard to capture the scale and immersion of the canyons and peaks with conventional 2D camera technology. One day I plan to get a digital SLR and panohead and make 3D QT VR pictures.

I've since tried a few, small spherical panoramas projects, e.g. MIT's Stata Center and LA's Getty Museum. I've also tested my setup on the east coast in Virginia's Cumberland Gap but I haven't had the opportunity to follow through on Pusch Peak until recently.

So this autumn, I ascended the lower reaches of Pusch Peak with my spherical panorama gear. Unfortunately, the results are somewhat disappointing, revealing significant limitations of my equipment and process.

At altitudes of 1000m to 2000m, the strong desert sun here makes for unrelentingly harsh lighting (except during early mornings and dusk). In other words, rather challenging conditions for cameras, especially if one needs to capture a 360° view within a canyon at mid-afternoon, which will inevitably contain both brightly lit surfaces and deep shadows.

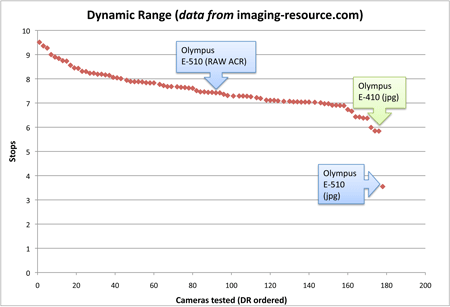
I'm using an Olympus E-510. And I've been taking jpeg images. As it turns out, the dynamic range of this combination has been tested to be well below par, see below:

This hasn't mattered until now.

It appears the solution, apart from getting a better camera, is to use RAW (not jpeg) images and maybe Adobe Camera Raw (ACR) to develop them. Assuming the test results translate well to the real world, I should be able to get nearly 3 stops more dynamic range without having to resort to bracketed exposures (for HDR etc.).

[Update: from discussion on dpreview.com, Jay Turberville pointed out that there must be something wrong with Imaging Resource's result for the E-510. The Olympus E-410, basically identical, tested out with a dynamic range of 5.99 on JPG. Still below par though.]

I will have to issue a promissory note here: to make time to ascend Pusch Peak again with my camera gear. And see if RAW will make a significant difference in real-world testing. (I'd also love to test a camera with state-of-the-art dynamic range but I don't know anyone with a Nikon and fisheye.)

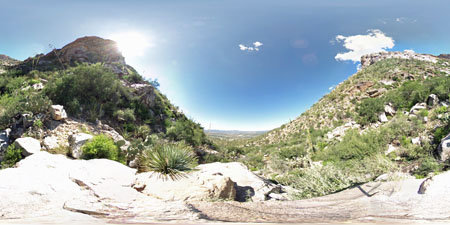
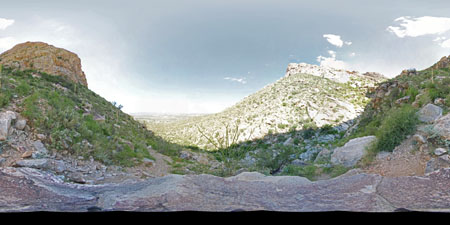
Meanwhile, to illustrate the problem, here are the two least blown-out spherical panoramas from my first shoot.

The first panorama is from lower down on the hike. Since the sun is mostly hidden, this one came out the best:

pano1.mov (10.2MB file, use QuickTime player)
pano1.swf (Adobe Flash)

The second panorama was taken higher up. As you can see, I've diddled around with exposure curves a bit in an attempt to recover as much detail as possible but you can clearly see nasty artifacts such as banding in the sky.

pano3.mov (9.6MB)
pano3.swf (Adobe Flash)

Wednesday, October 29, 2008

New running shoes

Recently, my shins have started to ache on my runs. Shin splints are an overuse injury.

According to experts, this is a sure signal to buy new shoes as the cushioning is no longer effective.

I've accumulated only 200 miles or so rather than the expected 350-500 miles on my Nike Air Zoom Vomero 2+ but they're certainly over 6 months old.

To prolong the life of the old shoes would be false economy, as ignored shin pain can result in stress fractures. So today I went to the running store to pick up a new pair - or pairs, as you'll see presently...

Somewhat irritatingly, shoes manufacturers (like ski manufacturers) feel the need to update running shoes every single year. Sometimes it's only the graphics, other times there are significant morphological alterations. Fortunately, in the case of the Vomero, the fit hasn't changed although the sole have been updated. Voila, the Nike Air Zoom Vomero 3.

Another wierd phenomenon is that serious running shoes (current year) tend to be expensive and aren't discounted much off list if at all. You won't find the Vomero 3 for 30% off at places like Sports Authority. The list price is $125.

My first run today with the revised Vomero was a midweek 7.5 miler. I definitely detected improved cushioning over my worn Vomero 2+, though my shins still ached. Hopefully, the purchase wasn't too late, and ice and a NSAID will improve the situation.

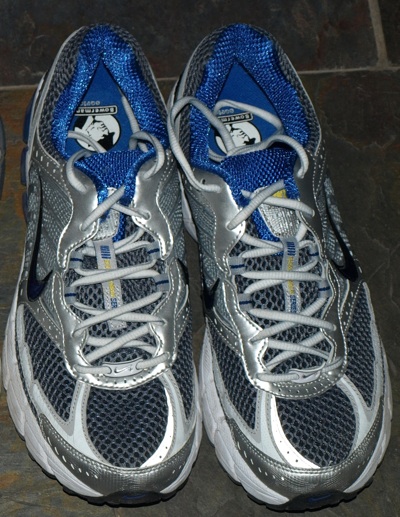
At the same time as buying the Vomero 3, I happened to try the super-high-tech (and world's lightest) Nike Lunar Racer+ that was introduced to coincide with the Beijing Olympics. During the Olympics, I didn't notice any marathoners using it. In fact, it took me a while to locate the evidence on nbcolympics.com:

It's a mistake to go too light on running shoes since cushioning will be compromised. So I was a bit surprised to find it as soft as the supercushy Vomeros. That feeling comes solely from the new lightweight foam used. There is no cushioning whatever in the upper: no liner, no padded tongue. It's minimalist to the point of being almost transparent and as a result its weight is about half the Vomeros.

Of course, that meant I had to buy it as well. (The fit is a little different, I had to move up half-a-size.)

[L to R: Lunar Racer+, Vomero 3 and Vomero 2+]

As a recovering weight-weenie cyclist, I also find it surprising that at a list price of $100 it actually costs less than the heavier shoe. When it comes to cycling componentry, you always pay more for weight reduction, sometimes way more for a ridiculously insignificant percentage decrease.
Saving the weight of one shoe (0.33 kg) seems pretty significant until you realize I weigh somewhere in the range of 68-69 kg at present. In other words, I seriously doubt I will be able to see the effect of the shoe in terms of my running speed. And in any case, I'm not exactly elite athlete material.

Adding the Lunar Racer+ to my shoe collection represents a deeply embarassing personal statement of dedication and commitment to completing my run workouts come what may (modulo injuries) this semester. Shelling out another $100 on an event-only shoe (or at most a once-a-week-speedwork shoe) doesn't make practical sense.

And somewhat irrationally, I won't feel like lacing them up unless I feel I've earned my right to use them. And they won't make any measurable difference anyway. Go figure.

Monday, October 20, 2008

Running in San Francisco


Recently, I happened to be in San Francisco for a few days.

{Pic courtesy of Duffy Gillman]

What's the best way to see the city in a hurry?

One might think of their iconic cable cars, perhaps BART or buses.

Instead, I ran.

In two runs, I covered about 11 miles.
Both days were sunny.

There's definitely a runner's high to be felt pounding along the waterfront along San Francisco Bay and up and down those steep hills with great views.

Wish I could've stayed longer and gone further, e.g. do the Golden Gate bridge.

Routes

Starting out each time from near Union Square along Market St out to the Ferry House.
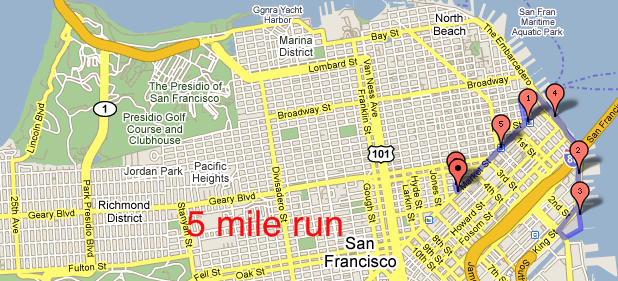
Then Run #1: turning right to head south along the Embarcadero looping around the SF Giants' AT&T Baseball Park and back. About 5.5 miles and mostly flat. (Found this route on the SFRRC's website.)

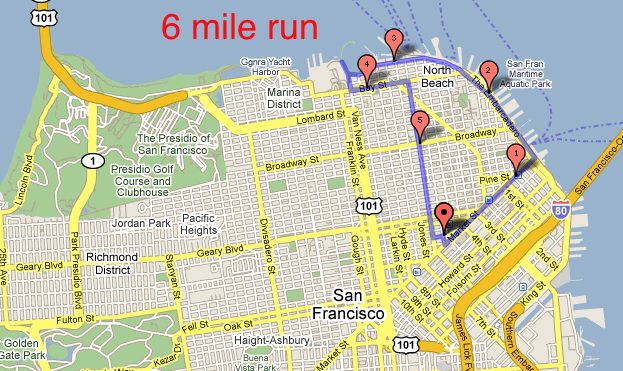
Or Run #2: turn left to head north along the Embarcadero to Fort Mason, but coming back along Taylor St over Russian Hill (with a view of Telegraph Hill and the Coit Tower to the left) and then Nob Hill. About 6 miles.

Bonus

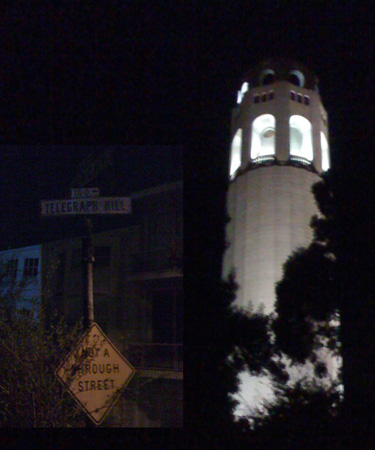
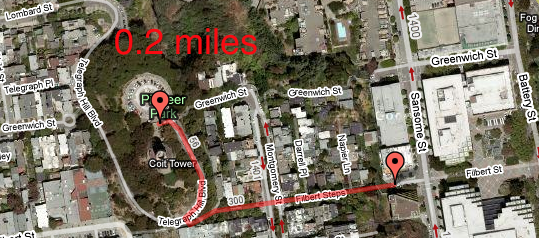
One evening after dinner, I had the chance to cross the Levi Plaza and run up the Filbert Steps to the Coit tower in street clothing and shoes.

I felt like passing out but managed to snap two pictures with my iPhone camera (below).

Only two tenths of a mile according to Google Maps. Who needs a stairmaster and gym when you have this?